WinSCP is a free SFTP, SCP and FTP client for Windows. Apart from other functions, WinSCP is used to view and copy files and folders on a remote Raspberry Pi.
Table of contents
Introduction to WinSCP and the Raspberry Pi
WinSCP is a network utility that can use SCP (secure copy protocol) to log into a Raspberry Pi operating system using its username and password. The Raspberry Pi OS (formerly known as Raspbian), OpenELEC and RetroPi are among the operating systems that can be used to connect to.
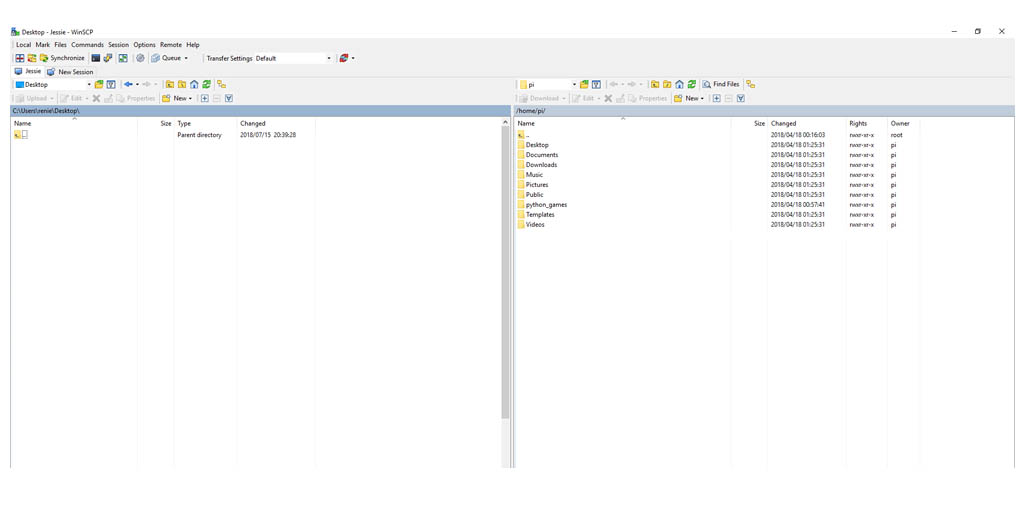
As a client, WinSCP has two file panels — one for the local interface and one for the remote interface. Each file panel looks similar to Windows Explorer in that it presents files and directories in a folder-like fashion.
The file panels allow for drag-and-drop functionality between the interfaces and simplify creating, copying, renaming and moving files and directories. User permissions can also be set using WinSCP.
Why use WinSCP to connect to a Raspberry Pi?
Raspberry Pis are popular to use as small, standalone devices on a network. By using WinSCP, the need for these devices to have a keyboard, mouse and screen is reduced to only their setup phases. After an IP address has been obtained, WinSCP can be used from a remote Windows computer to have file access to the Raspberry Pi.
WinSCP and PuTTY
Both WinSCP and PuTTY can be installed on a Windows device. WinSCP used together with PuTTY will extend remote access to a windowed, terminal-like CLI.
- Get the Raspberry Pi 4B 8GB Starter Kit from Amazon.com
- Get the Raspberry Pi 4B 4GB Starter Kit from Amazon.com
Requirements for using WinSCP
- The Raspberry Pi and the remote computer are connected to the same local network.
- The Raspberry Pi has SSH enabled. Some Raspbian distributions have SSH enabled by default but can be configured using the Raspi-config tool.
- The IP address of the Raspberry Pi is known. It can be obtained by using the following terminal command:
hostname -I
Download & configure WinSCP
WinSCP can be downloaded from the official WinSCP website. The installation on a Windows operating system is straightforward. After downloading and running the installation file, the default settings can be used.
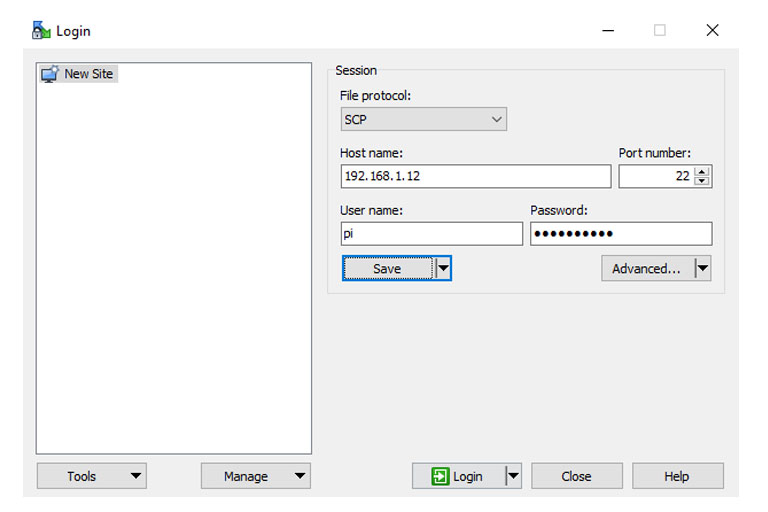
The first time WinSCP is opened there will be a blank Login area (left). After clicking on New Site, supply all the details of the Raspberry Pi in the Session area.
The IP address of the Raspberry Pi is saved under Host name, the File protocol should be set to SCP and the Port number should be left as 22. After selecting Save, WinSCP will prompt for a Site name and the option to save the password.
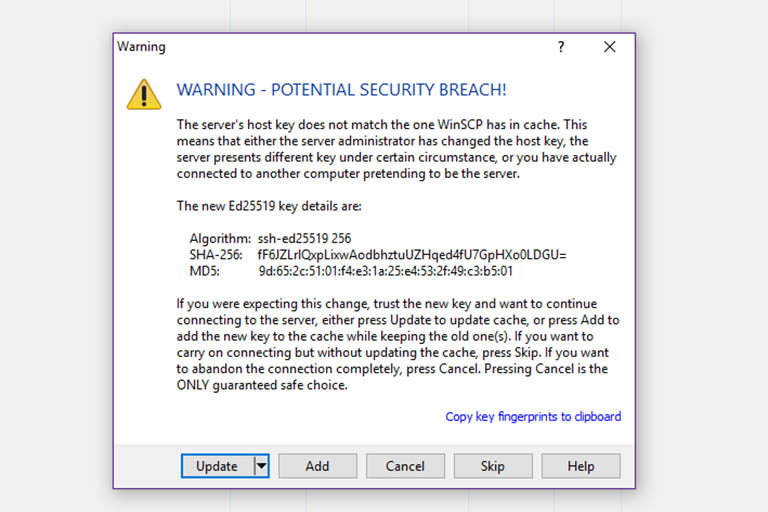
By double-clicking on the Site name in the Login area, the WinSCP terminal will open. During the first connection, PuTTY will obtain the host key from the Raspberry Pi, which will probably cause the following security alert to pop up.
Click Update to continue with the connection.
For Raspbian, the default username and password are pi and raspberry. Multiple saved Logins to different devices can be created.
The settings can be changed by selecting the applicable saved Login and Edit. After changing the settings it needs to be saved again.
Optional settings
The default WinSCP settings will work for most users, but over time some additional settings might become handy.
Settings can be changed for WinSCP (i.e. affecting all sessions) or for a specific session only.
Settings for WinSCP are situated under Preferences (situated in the Options menu on the top menu bar, by clicking the grey gear icon). It can also be accessed by pressing Ctrl + Alt + P.
Settings for a specific session are located under the Advanced Site Settings. by pressing the Advanced button. The Advanced button becomes pressable after clicking the Edit button. The changes need to be saved afterwards.
Show hidden files
To show hidden files in WinSCP, it can be activated in the Panels section under Preferences, or by pressing Ctrl + Alt + H.
Multiple instances of WinSCP
Opening multiple instances of WinSCP is also possible. While WinSCP is already running with another session, hold down the Shift key while opening WinSCP again (i.e. by clicking on the shortcut icon).
Root privileges
Root privileges are required to gain access to directories and files other than the home directory of the user. When a user has been assigned root privileges (i.e. the pi user) the user can be elevated to root after login.
The option to elevate the user to root is situated in the Advanced Site Settings in the SCP/Shell section under the Environment panel. Under Shell, the sudo su - option needs to be selected.
Using WinSCP to connect to OpenELEC & XBMC (Kodi)
WinSCP can be used to gain access to screenshots, fan art, banners, posters or any other media-related files from Kodi.
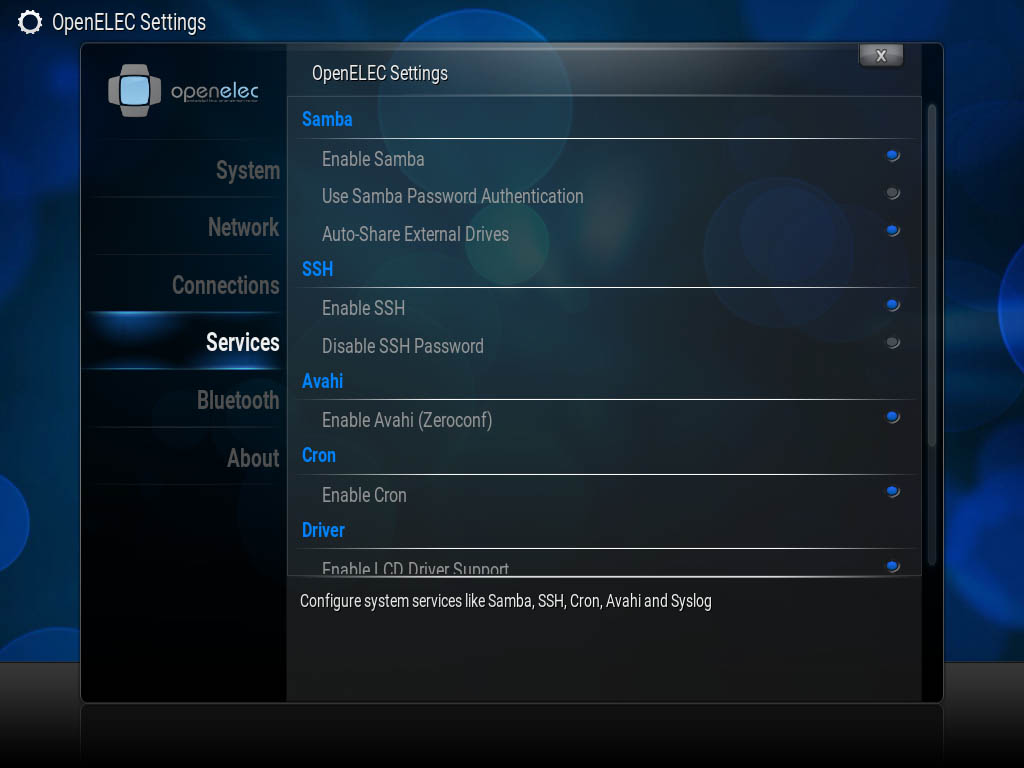
For SCP, SSH needs to be enabled. Kodi might not have SSH enabled. SSH can be enabled from the Services section by going to Settings -> OpenELEC -> Settings (do not change the username and password settings for now). A reboot might be required. SFTP can also be used to connect to WinSCP to Kodi.
The default username and password for OpenELEC are root and openelec and root without a password for XBMC.
Using WinSCP to connect to RetroPie
WinSCP can be used to connect to RetroPie to get access to screenshots and probably many other relevant directories.
To use WinSCP to connect to RetroPie, SSH needs to be enabled from the RetroPie Configuration screen by choosing RASPI-CONFIG-> 5 Interfacing Options -> P2 SSH (tested on RetroPie 4.2).
The default username and password for RetroPie is pi and raspberry.
Using WinSCP to connect to a Raspberry Pi WordPress server
It might be necessary for WordPress theme and plugin developers to gain access to the Raspberry Pi server’s web directory (/var/www/html).
If the server was configured correctly WinSCP can use the username and password set for the Raspberry Pi. For Raspbian, the default username is pi and password is raspberry.
Conclusion
WinSCP is an excellent tool for managing file transfers between a remote computer and a Raspberry Pi operating system — securely. The ability to save and add multiple profiles makes managing file transfers on even a large number of Raspberry Pis easy and efficient.
With its familiar windows-like file explorer interface, files can be dragged and dropped from one device to another. WinSCP is popularly used to connect to Raspbian, Kodi and RetroPie.


