

The Steam Link App streams games from your PC's Steam Libray. It can be installed on a Raspberry Pi allowing Steam games to be played remotely over a LAN.
Table of contents
Introduction to running the Steam Link App on a Raspberry Pi
Steam is a major online digital distribution platform developed by the Valve Corporation with a large aim to distribute video games to PC gamers.
Steam Link is a free App developed by Valve to extend the Steam gaming experience to a mobile device, TV, or another PC using a network connection.
The Steam Link App is available for all major platforms incl. Windows, Mac, Linux and, apart from Steam’s own device — the Steam Link, it can be accessed from devices such as iPhones, iPads, Apple and Samsung Smart TVs, Android devices, and Raspberry Pis.
The Steam Link device was made by the Valve Corporation in 2015. In 2018 the device was discontinued and the shift changed to maintaining the Steam Link App.
At the time of writing, Steam Link App was compatible with Raspberry Pi 3 and 4 models.
The Steam Link technology allows streaming games from the Steam Library on your PC to one of the mentioned devices. Streaming is done by using the hardware of your PC and is mirrored/broadcasted over the LAN.
This post will show how to install and run Steam Link App on a Raspberry Pi which, for example, can be used to connect to remote controls and a TV to play games from your Steam Library.
- Get the ROCCAT Burst Pro PC Gaming Mouse from Amazon.com
- Get the Gigabyte GeForce GTX 1060 3GB GPU from Amazon.com
- Get the MSI GeForce GTX 1060 6GB GPU from Amazon.com
- Get the Raspberry Pi 4B 4GB Starter Kit from Amazon.com
- Get the Raspberry Pi 4B 8GB Starter Kit from Amazon.com
Assumptions and requirements
The Steam Link App incorporates into the Steam ecosystem. It is assumed to have a Steam account and a PC as a streaming device.
Initially, a connection to the internet will be required to install the libraries. Terminal commands will be used. After that, the Raspberry Pi only needs to be connected to the same local area network (LAN) as the PC hosting Steam.
During the setup phases, the Raspberry Pi will need a keyboard and mouse will. It is also highly recommended to have a joystick or two available.
Choosing the Raspberry Pi to run Steam Link
Steam Link can be installed using the Raspberry Pi models 3B, 3B+, 4B and 400. To get a better idea of which Raspberry Pi model is best to use they can be compared to the original Steam Link device.

Comparing the Raspberry Pi 3B, 3B+, 4 and 400 with the Steam Link device.
When looking at Valve’s Steam Link device it had a 100 Mbit/s Fast Ethernet port and Dual Band (2.4GHz and 5GHz) Wireless 802.11ac. The Raspberry Pi 3B has slower Ethernet speeds while models 3B+, 4 and 400 have 1000BASE Ethernet — meaning that a wired network will be about 10x faster.
Raspberry Pis 3B, 4 and 400 have Dual Band 802.11ac Wi-Fi, while the Raspberry Pi 3B will be slower with only the 2.4GHz Band.
From a CPU point of view, all the listed Raspberry Pis are significantly faster.
The Steam Link device could handle H.265 decompression using hardware. So does the Raspberry Pi 4B and 400. The Raspberry Pi 3B and 3B+ have a fast enough CPU to decompress H.265 using software.
Although RAM probably plays less of a role in streaming, all the Raspberry Pi’s ship with more RAM than the Steam Link.
As with the Steam Link device, all the Raspberry Pi’s listed are capable of handling resolutions of up to 1080p. The Raspberry Pi 4B and 400 can handle up to 4K resolution.
From a USB point of view, all the Raspberry Pi’s allows for an extra game controller or peripheral to be connected when a keyboard and mouse are also connected.
Bluetooth is present on the Steam Link device and all the listed Raspberry Pis. The Raspberry Pi 4B and 400 have Bluetooth 5.0 instead of 4.0.
If cost is a factor, Raspberry Pis will probably lose the battle. The Steam Link device came at a price of $49.99 but was shipped with a power supply, storage (only used for the operating system), a nice-looking case and an HDMI cable. Raspberry Pis need these accessories added to the order list.
Since the Steam Link device is not available anymore, the Raspberry Pi 3B+ seems like the best overall performance and value for money. If you intend to use the Raspberry Pi as a little desktop computer as well, the Raspberry Pi 4B might be a good bet, too.
If your Raspberry Pi is already running, the model number can be obtained using the following terminal command:
cat /proc/cpuinfo
We used a Raspberry Pi 3B to run and test Steam Link.
Choosing a MicroSD card to run Steam Link on a Raspberry Pi
The minimum MicroSD card size required for the Full version of the Raspberry Pi OS is 8GB.
A MicroSD card is only required to run the operating system the Steam Link App is installed on.
While streaming, no data will be saved on the Raspberry Pi itself. Steam Link on a Raspberry Pi requires no additional hard disk space apart from storing the operating system (see below), the steamlink libraries (see later) and maybe capturing some screenshots (PrintScreen / PrtScr).
A larger SD card (16GB or 32GB) comes at additional costs but will allow for the Raspberry Pi to be used for other functions too — e.g. as a Desktop computer.
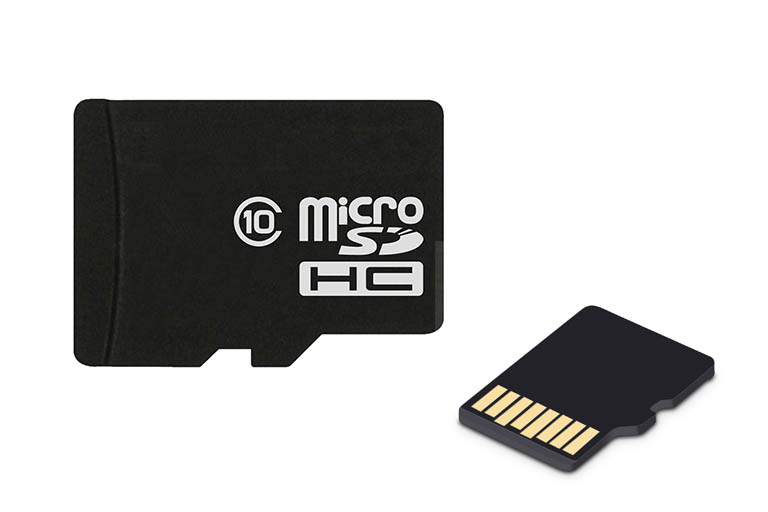
Irrespective of the size of the MicroSD card, the fastest available card (i.e. Class 10 or faster) is recommended.
- Get the SAMSUNG MicroSDHC EVO Memory Card (various sizes) from Amazon.com
- Get the SanDisk Ultra MicroSDHC Memory Card (various sizes) from Amazon.com
- Get the HAMA 8-in-1 SD Card Reader from Amazon.com or BangGood
Choosing the operating system to run Steam Link on a Raspberry Pi
The Steam Link App can be easily installed and accessed on the Full version of the official Raspberry Pi OS (formerly Rasbian). For some reason, Bullseye (the latest version at the time of writing) did not work.
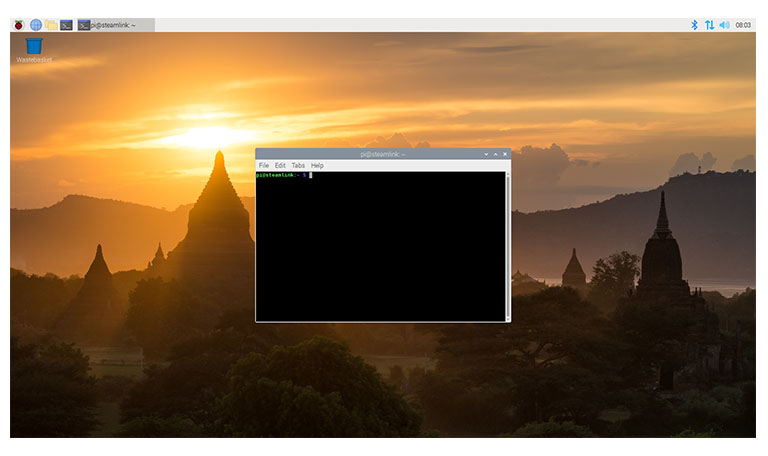
The Full version of Raspbian Buster with the Terminal opened. Raspbian Buster is the latest successfully tested Raspberry Pi OS which hosted the Steam Link App.
The Full version of Raspbian Buster (32-bit) works fine. The Desktop version is required to be able to launch the GUI of the Steam Link App. The Steam Link App was first released for Raspbian Stretch.
Raspberry Pi 4’s and later will need Raspbain Buster to work.
Installing the Steam Link App on a Raspberry Pi
Steam Link is installed on the Raspberry Pi using the install terminal command. The Terminal can be opened by clicking its icon at the top right corner of the Desktop area.
The make sure the Raspberry Pi OS libraries are up to date, use:
sudo apt-get update
sudo apt-get upgrade
To install the Steam Link App, use the following command:
sudo apt install steamlink

Installing Steam Link from the Raspberry Pi terminal
At the time of writing this post, the Steam Link App was at version 1.0.10.
After the initial Steam Link App libraries have been installed, additional packages need to be downloaded and installed. This will happen during the first run.
The Steam Link icon has not yet been created, so to run the Steam Link App for the first time, and install the icon and these packages, the steamlink command needs to be used from the terminal:
steamlink

Additional Steam Link libraries will be installed during the first run of the Steam Link App.
During this installation process, a separate window will open. Follow these windows.
A Warning Message might appear saying that you might need to increase the GPU memory. Click on the OK button to ignore this message for now.

Raspbian GPU memory warning message.
When asked to get additional archives, type in Y for yes and press the Enter key to continue.

Additional archives to run Steam Link on a Raspberry Pi needs to be installed.
A Steam Link App icon will be created on the Desktop. To run Steam Link from the terminal, use:
steamlink
On two occasions, the user will be asked to press the return key to continue. Press the Enter key on the keyboard.

When asked to press return to continue, press the Enter key.
To exit the Terminal, use:
exit
Running the Steam Link App
The installation process will end with opening Steam Link. After the Steam Link App has been successfully installed on the Raspberry Pi, its shortcut icon will be added to the desktop for future use. Steam Link can also be executed from the terminal:
steamlink
After clicking on the Steam Link icon, Raspbian will ask to either Execute the file, or execute it in Terminal.
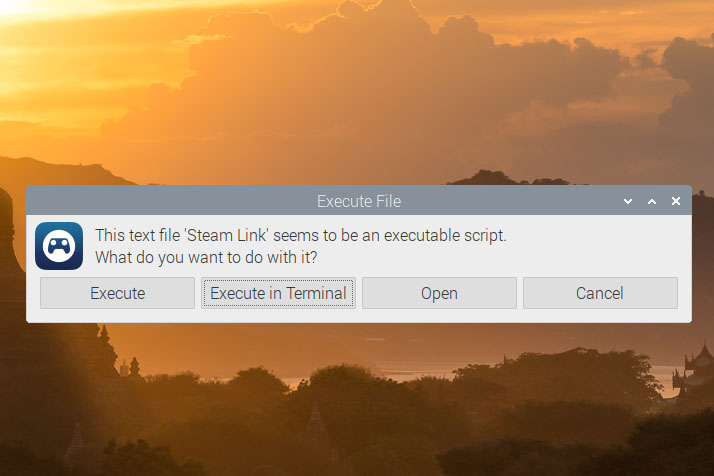
The popup screen after opening the Steam Link icon file. Both Execute and Execute in Terminal can be used.
From here, either Execute or Execute in Terminal can be selected.
When running the Steam Link App for the first time, there are three things that need to be configured: the controller(s) (see the section below), the streaming computer and the network.
While the controllers are paired and configured, Steam Link needs to know which computer to connect to — i.e. the computer where the stream will come from.
Make sure the streaming computer is running the Steam Client.
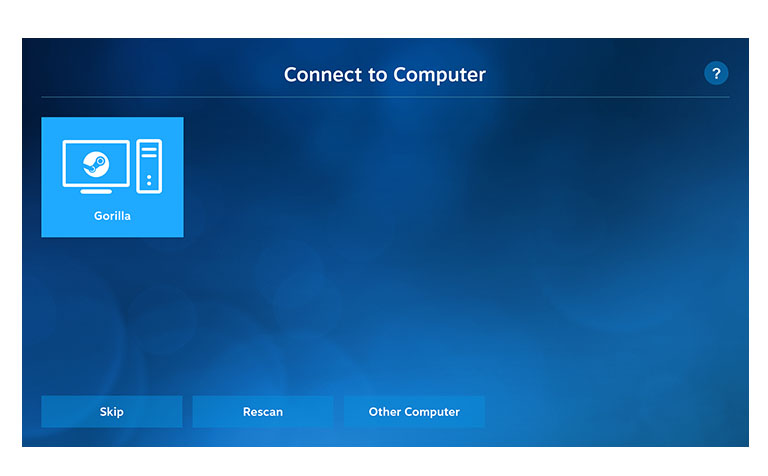
The Steam Link “Connect to Computer” screen. The computer that will host the stream can be selected from here. In this case, Gorilla was used.
After choosing the computer from the options given, Steam Link will generate a Pin that needs to be entered into that computer’s Steam Client.

After a computer was selected, Steam Link will generate a session pin to be entered on the Steam Client computer.
The Pin can be entered while Steam is open.
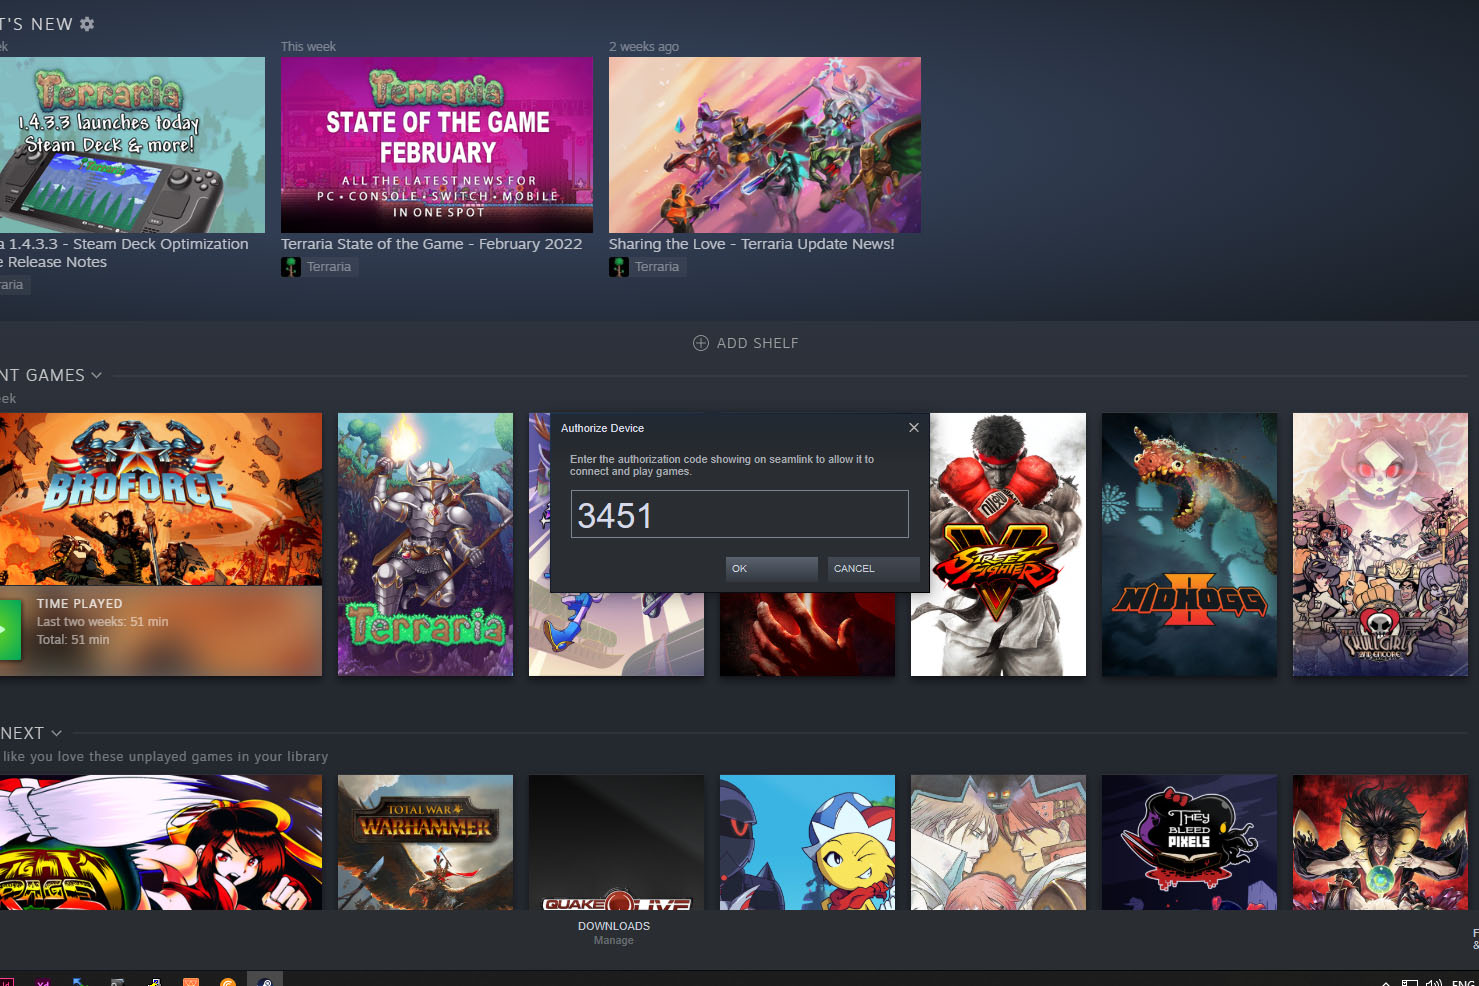
A popup screen where the Steam Session Pin can be entered will automatically appear on the Steam Client computer.
After the Pin has been successfully entered, Steam Link will continue to test the network speed. This will give an indication of how well the Steam Link App will perform.

The Steam Link network test. In this case, both the Raspberry Pi and the streaming computer were linked to the network using Ethernet.
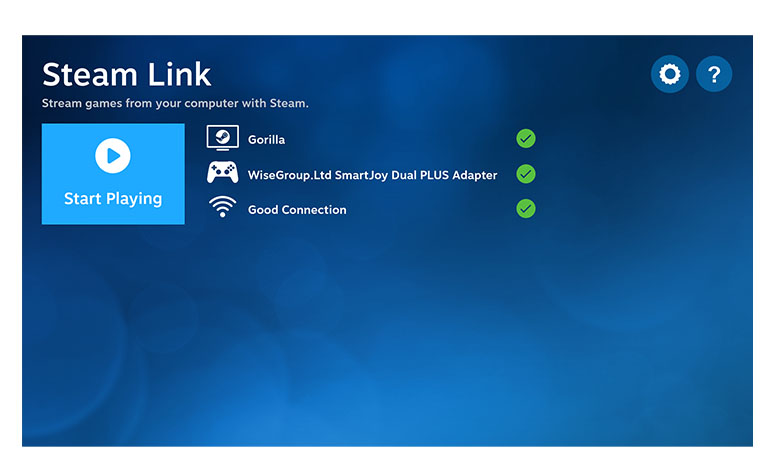
After all three configuration steps have been completed, the Steam Link App will give to option to “Start Playing”.
Low GPU memory message
A Raspberry Pi low GPU memory message might appear after installing the Steam Link App and each time the App is executed.
I’m not sure what the significance of this warning message is for running Steam Link on a Raspberry Pi, but it can be fixed by allocating 128MB of memory to the GPU. Maybe it’s because of the operating system or because of the Raspberry Pi 3B used.
Raspbian GPU memory warning message.
It is said that there will be no boost in the Raspberry Pi’s performance by allocating more memory to the GPU. This warning was also ignored during the initial testing phases and the Steam Link App performed normal/well.
The low GPU memory message will disappear after allocating at least 128Mb to the GPU in the Raspi-config tool.
The Raspi-config tool is situated under Raspberry Pi Configuration under Preferences in the Applications menu.

Setting 128MB memory to GPU on a Raspberry Pi
To set the GPU memory to 64 or 128MB go to the Performance tab and enter either 64 or 128 under GPU Memory.
Connecting game controllers to a Raspberry Pi with Steam Link
Although not all games need (or support) game controllers, it is highly recommended to connect one — even if it is just to navigate through the Steam UI. A keyboard and mouse can also be used.
When the Steam Link App runs for the first time, the Pair Controller screen will appear. This step can either be skipped or you can pair an official Steam Controller or another type of controller.
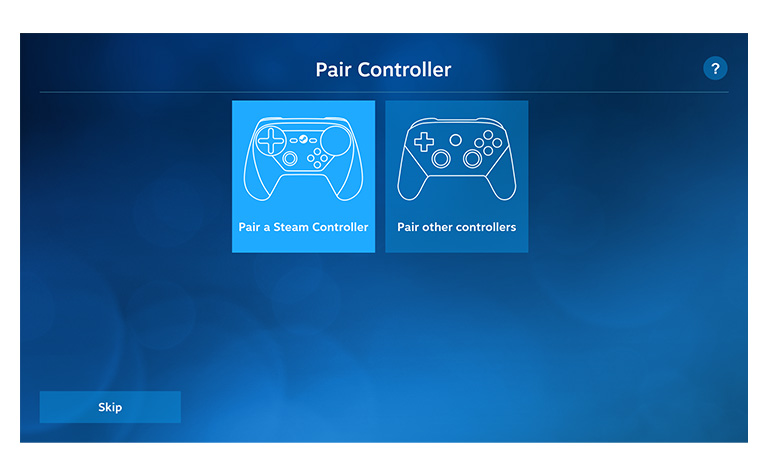
The Steam Link “Pair Controller” screen is where you can either pair a Steam Controller or another supported controller or peripheral.
Steam Link has built-in support for the following controllers:
- The official Microsoft Xbox One Wired Controller
- The official Microsoft Xbox One S Controller (wired or wirelessly using Bluetooth)
- The official Microsoft Xbox One Elite 2 Controller (wired or wirelessly using Bluetooth)
- The official Microsoft Xbox 360 Wired Controller
- The official Microsoft Xbox 360 Wireless Controller for Windows (with wireless receiver)
- Sony Dualshock 4 (wired or wirelessly using Bluetooth)
- Sony PlayStation 2 controller (wired using the SmartJoy Dual PLUS Adapter)
- The official Nintendo Switch Pro Controller (wired)
- Logitech Wireless Gamepad F310, F510, and F710
- Razer Kishi and Raiju controllers
- SteelSeries Stratus Duo
- Keyboard and mouse
We used a SmartJoy Dual PLUS Adapter with PlayStation 2 controllers.
The next step will be to configure the selected controller. The button that will be programmed will show one by one on the screen. Continue by pressing the (closest) corresponding button on the controller. If there is no corresponding button, choose Skip. Back or Restart can also be selected.
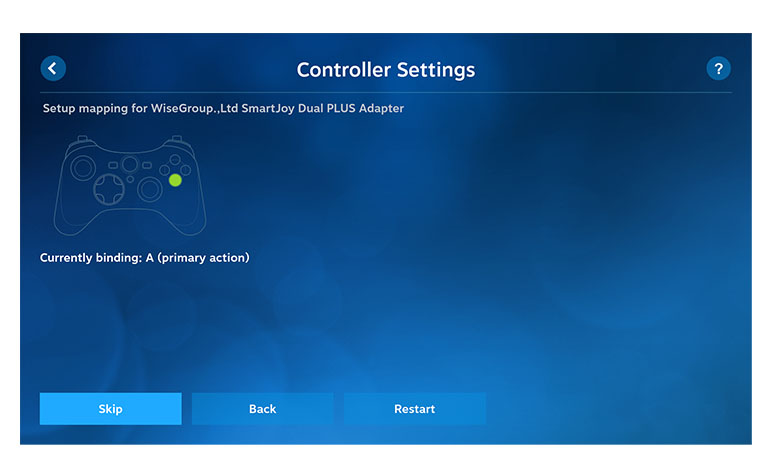
Controller buttons are bound by pressing the controller button corresponding to the one on the screen.
Steam Link will automatically exit the Controller Settings screen after all the controller buttons have been bound.
A different or additional controller can be paired or configured by going to the configuration section. The configuration section is opened by pressing the gear icon on the top right of the screen.
Choosing a network connection for the Steam Link App
The Steam Link App can use Wi-Fi or Ethernet to stream from a Steam client. The Raspberry Pi can have a dynamic or static IP address assigned to it.
Most of the consulted resources recommend that an Ethernet connection is used to connect both the Raspberry Pi and the Steam client computer to the local network.
A wireless network (i.e. Wi-Fi) is prone to random disconnections and is generally slower than wired connections. In the case where only a Wi-Fi connection is available, the following recommendations can be made:
- If supported, use the 5GHz band instead of the 2.4GHz band
- Place the Raspberry Pi as close as possible to the router
The 2.4GHz Wi-Fi band is prone to interference from other devices such as baby monitors and microwaves. Your router should have the option to create separate SSIDs for different bands.
Uninstalling Steam Link on the Raspberry Pi
To open up space on the Raspberry Pi, the Steam Link App can be uninstalled using the following command:
sudo apt remove steamlink
The Steam Link desktop icon will have to be removed manually. To do this, right-click on the icon and select:
Conclusion
This post showed how to run Steam Link on a Raspberry Pi. The Steam Link App can easily be installed on a Raspberry Pi using two terminal commands. Raspberry Pi models 3B+ and higher compare well with the original Steam Link device and, with a solid network connection, will give a near-perfect streaming experience.
Very detailed description. That’s how a tutorial should be put together.