As an early-generation 3D printer, the TEVO Tarantula will need repairs and maintenance. Here the TEVO Tarantula replacements parts are listed and discussed.
Table of contents
Introduction to TEVO Tarantula replacement parts
Although the 2018 TEVO Tarantula 3D printer is long gone and not commercially available anymore, many of us still owning one will need parts to keep it in tip-top shape.
The 3D printer’s parts can get old, wear and tear, rust, overheat and/or simply break. Parts are generic and will work on many other printers too. Product links are available from BangGood — where I bought my TEVO Tarantula — and Amazon.com.
The list of TEVO Tarantula replacement parts is ordered alphabetically. Parts can either be ordered upfront or when needed. For the TEVO Tarantula, it is usually more budget-friendly to replace the broken parts than to replace the entire printer.
This list of TEVO Tarantula replacement parts can also be used as a reference for building your own 3D printer.
Cable ties
Cable ties (also called zip ties) are always handy when it comes to organising wires. With the TEVO Tarantula, they were also used to secure belts and group wiring together with the filament feeding tube towards the extruder.
The TEVO Tarantula has many cables to organise. Appropriately colour-themed cable ties help make the printer look fancy.
Cooling fan
The TEVO Tarantula came with one brushless cooling fan directed to the mainboard. Other than ware and tare where the fan needs to be replaced, an additional fan might also be required — especially when the original fan was used as a filament layer cooling fan.
Corner brackets
The stock TEVO Tarantula shipped with two types of aluminium frame corner brackets, the AJ28 corner bracket and the LJ20 T Slot corner bracket. The TEVO Tarantula uses 2020 and 2040 aluminium frames (aka corner extrusions according to the assembly manual).
If for whatever reason any of these two corner brackets break, replacement brackets can be re-ordered.
AJ28 corner brackets
Although they can be 3D printed, aluminium AJ28 corner brackets (also called angle corner joints or right-angle brackets or 2028 corner connectors) were used in the original TEVO Tarantula. Unlike the LJ20 T Slot corner brackets (see below), these brackets sit on the outside of the aluminium frame.
LJ20 T Slot corner brackets
Where the AJ28 corner brackets sit on the outside of the aluminium frame, the LJ20 T Slot corner brackets (also called L-shaped corner brackets or L-corner connectors) are hidden on the inside of the frame. They are fastened with grub screws.
Filament feeding tube
The stock TEVO Tarantula had more than enough filament tube for at least one replacement. Not knowing what I did at the time of assembling, I used my spare length in less than no time.
These tubes have a tendency to pull back onto the filament feeder gear where they get damaged. Make sure it’s a PTFE (Polytetrafluoroethylene) tube and that it is indicated for 1.75mm filament.
Tubes are available in white, black, red and blue colours.
Hex Allen keys
Being a DIY 3D printer, the TEVO Tarantula was mainly assembled using Allen keys. Allen keys are supplied with the stock TEVO Tarantula. In the case where you might have lost the stock Allen keys, or they degraded, you will need a new Allen key set to do most of the replacements on this printer.
Limit switches
The TEVO Tarantula came with three limit switches. Two of my limit switches (aka end-stop switches) broke. One from wear and tear and the other from me trying to relocate it to a better position.
When looking for limit switches, you can either replace the switch housing itself, or the switch including the wiring that connects it to the mainboard. Wiring is included with a replacement kit. Both these options have their pros and cons, but for me, the best solution was to replace the entire unit.
Power supply
The TEVO Tarantula used a generic 12V 25A power supply with a variable input (110V/220V). 3 outputs were supplied. The outer box of the power supply is prone to rust and the connectors can wear and tear and/or break.
Screw terminal block connectors
Screw terminal connectors should be replaced in the case where current terminal block connectors do not screw tight enough, the connector broke or in the case of a connector burnout.
If cables are tied together these connectors take a lot of Amps.
As a tip, the wiring should not be tinted and should be crimped properly to prevent overheating. Look for block connectors with a power rating of at least 10 Amps. An external MOSFET should be used between the heat bed power connectors and the power supply.
Screws/bolts, nuts and washers
The stock TEVO Tarantula had lots and lots of screws/bolts, nuts and washers. Socket screws used ranged from 16mm M2 right through to 35mm M5. Nuts ranged from M2 to M5 and included plenty of M4 T nuts and M5 locknuts. There were normal M4 washers and M5 spring washers.
- Get the M2 Stainless Steel Socket Head Machine Screws from Amazon.com
- Get the M3 Stainless Steel Socket Head Machine Screws from Amazon.com
- Get the M5 Stainless Steel Socket Head Machine Screws from Amazon.com
- Get the Stainless Steel Nuts from Amazon.com or BangGood
- Get the Aluminium T Nuts from Amazon.com or BangGood
- Get the Assortment Lock Nuts (incl. M2 & M5) from Amazon.com
Apart from screws/bolts, nuts and washers, make sure you have a diverse Allen key set (see earlier).
Heated bed levelling springs
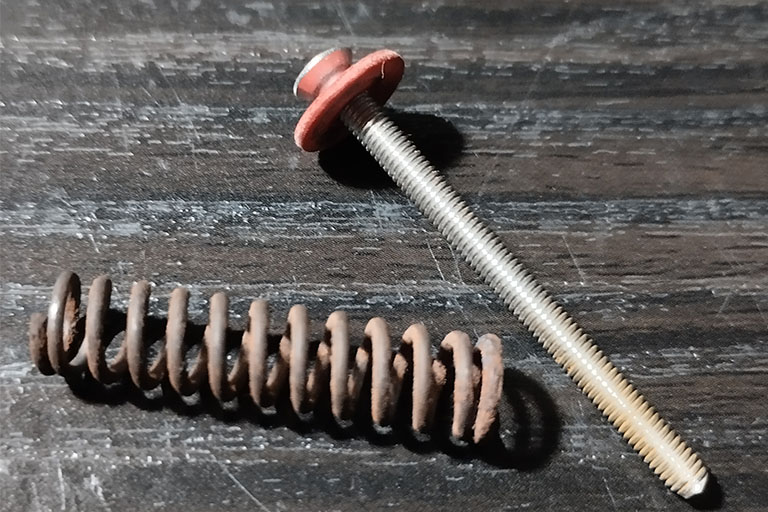
Over time my Tevo Tarantula’s heated bed levelling springs started to rust badly. Although they were still intact, I felt it was time to replace them.

Old Tevo Tarantula heat bed level spring and screw. Mine rusted over time. Also shown is the Teflon washer on the screw that goes on the underside of the heat bed.
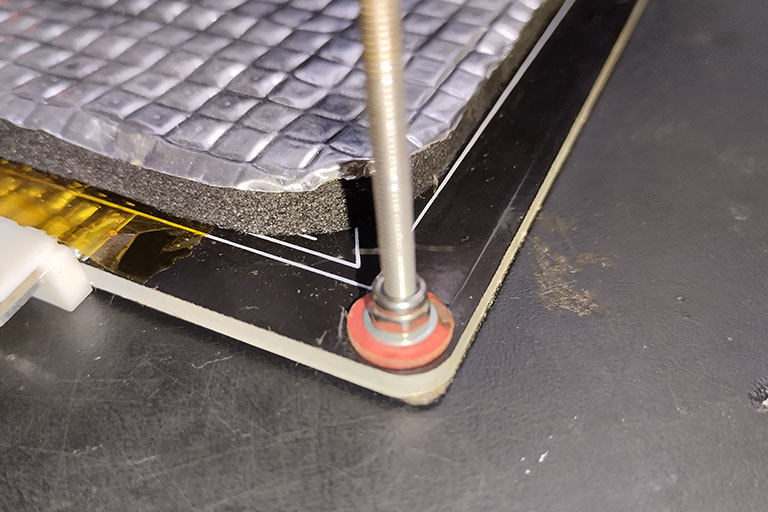
While doing some research on replacement parts, I also came across some info on how to stabilise the levelling screws too. The links below include 3mm washers to place on top of the Teflon washer and M2 locknuts to secure the screw.
- Get the 3D Printer Die Spring (20pcs, 8mm x 30mm, Blue) from Amazon.com
- Get the Assortment Lock Nuts (incl. M2 & M5) from Amazon.com
So while replacing the bed levelling springs, the levelling screws can be upgraded by locking them into place.

Here the Tevo Tarantula’s heat bed levelling screws are locked in place and stabilised by adding a washer and M3 nylon inserted locknut over the Teflon washer.
If all else fails
If you cannot find the correct TEVO Tarantula replacement part, it might be cheaper to replace the entire 3D printer.
As mentioned earlier, the TEVO Tarantula (and its successor) has been discontinued, but here is what I believe is the next, budget 3D printer from BangGood or Amazon.com.
Conclusion
Being a DIY budget 3D printer, older TEVO Tarantulas will start to need replacement parts. The more common parts, especially those that I had to replace on my own printer, are listed and discussed here.
If all else fails, getting a new budget 3D printer might be better.


