
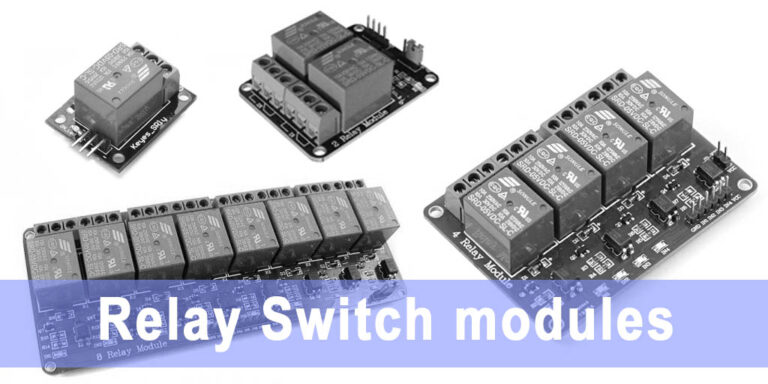
Relay switch modules are used as high-voltage AC switches using DC power. It is made up of a relay, screw terminals, a resistor, diode, capacitor, transistor and LED.
Table of contents
Introduction to relay switch modules
Relay switch modules are used as high voltage AC switches by connecting a signal and DC power supply to it. These modules are perfect for electronic hobbyists to use in projects.
A relay on its own is an electromagnetic switch operated by a small amount of electric current. The electromagnetic switch is used for turning much higher voltages on or off. Typically, the relay is powered by direct current (DC) and the electromagnetic switch is used to turn alternate current (AC) devices (power lines) on and off.
A relay needs a digital signal (HIGH or LOW) to know when to trigger the switch. The digital signal is typically the same as the voltage rating of the relay module (see below).
- Get the 5V Relay Switch Module from Amazon.com or BangGood
- Get the Basic Arduino Uno R3 Starter Kit from Amazon.com or BangGood
Songle relays
A popular relay used in relay switch modules is the 5 pin Songle SRD relay. They are typically 19.1 mm in length, 15.5 mm wide, and 15.3 mm high. Songle relays have models which can operate with DC voltages ranging from 3 to 48 V.
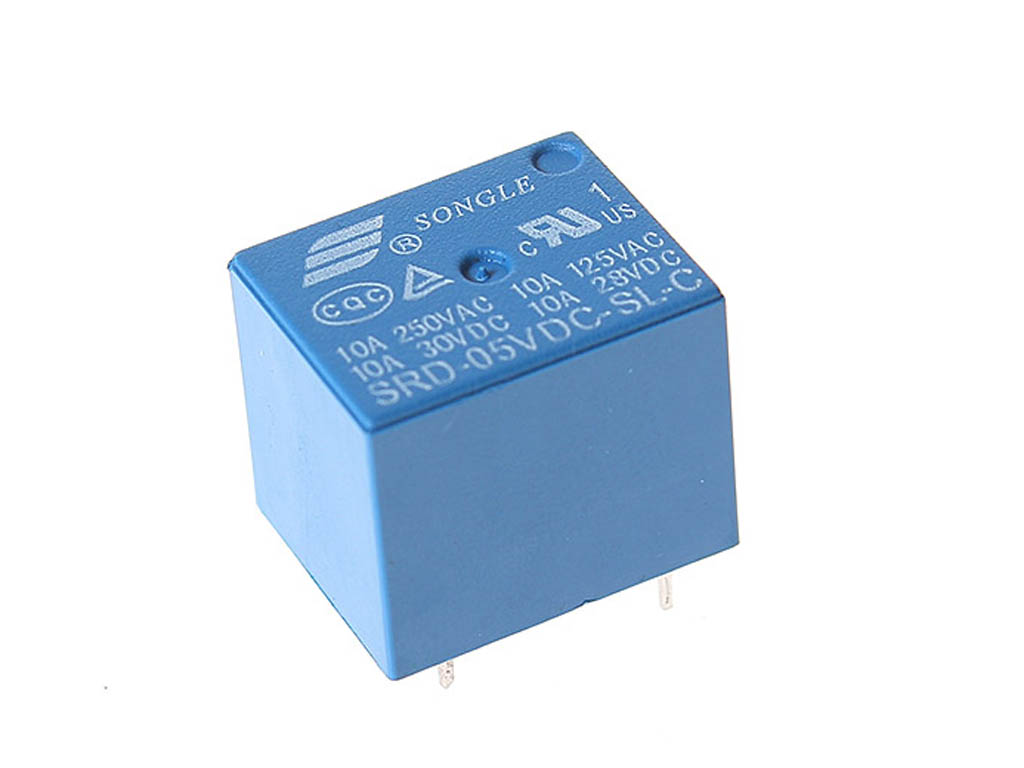
5-pin Songle SRD-5VDC-SL-C relay. This model is a C form, needs 5 VDC / 0.36 Watts to operate & is sealed.

Songle relay models.
Songle relay switches can be used independently and do not need to be used as part of a relay switch module. There are multiple manufacturers.
Why use Relay switch modules?
Apart from being used as a switch, it is also an isolated, safe link between AC and DC currents.
The popular 5V relay switch module needs for example 5V DC to power and can control/switch power lines between 110 and 250 V AC (at 10A). Relay switch modules are commonly used with microcontroller modules (e.g. Arduinos, ESP-01s and ESP32s) and the Raspberry Pi to supply power to the module, calculate logic and send trigger signals to open or close the power line. These modules are great to use as controllable switches for example garage door motors, lights, etc.
With their relatively small sizes and variations, they are suitable to fit all kinds of microelectronic projects.
Relay switch module specifications (based on Songle relays)
DC Pins: 3. IN, VCC, GND / S, +, – (marked)
AC Sockets: 3. NO (normal open), COM, NC (normal closed)
Trigger mode (digital write): Low-level, but high-level can also be used on some modules (dependent on AC socket configuration)
Working voltage: 3 – 48 V AC (model dependent)
Coil sensitivity: 0.36 – 0.45 Watt (Songle model dependent)
Level output: 3 – 48 V low (module dependent), 0 V high (onboard LED will turn on when voltage is low)
On-board LED: module dependent (very handy)
Module size: about 20 mm high, length & width dependent on the number of relays
Pin size: male, 5 x 2.54 mm
Breadboard friendly: NA
NC vs NO
On the AC side of the Relay switch modules, there are three plugin-in screw terminal connectors marked COM, NC and NO. These three connectors connect the AC-powered device/power lines. The way the device is connected to these three connectors will determine how it will function.
One end of the device should always be connected to COM. When the Relay switch module is turned off (i.e. no signal is supplied and the onboard LED is off) or the module’s power is disconnected, NC will connect with COM. In other words, the power line will be connected until a signal is supplied.
When the Relay switch module is turned on (i.e. the signal is supplied and the onboard LED is on), NO will connect with COM. In other words, the power line will be disconnected until a signal is provided.
Low-level trigger vs. high-level trigger
It is considered that the default trigger level is low, meaning the Relay switch module will activate (i.e. the onboard LED will switch on) when a 0 (LOW) signal is supplied (this might be module dependent).
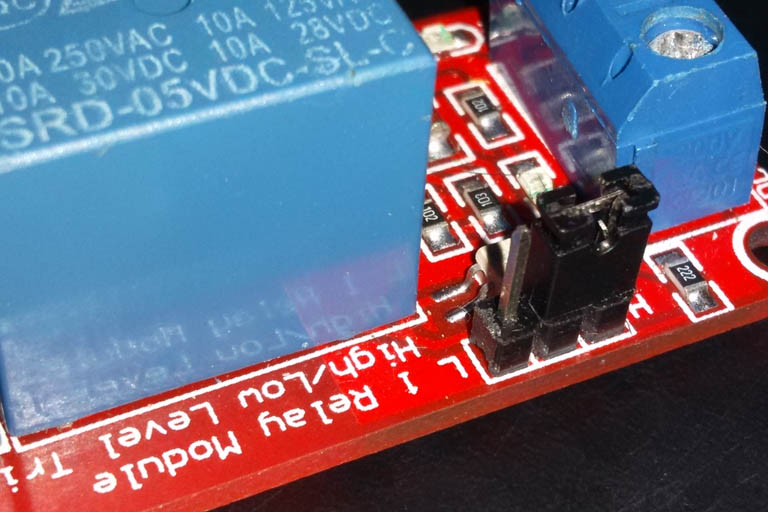
Relay switch module with a high/low-level triggering jumper. This relay switch module is set to high-level triggering.
In some modules, a jumper plug that can switch between low-level triggering and high-level triggering might also be present.
When high-level triggering is jumped, the Relay switch module will activate when a 1 (HIGH) signal is supplied. High-level triggering might, for example, be very handy when NC/COM is connected, but the default status of the power line should be disconnected.
To get started with Relay switch modules you will need
- Single 5V relay switch module Amazon.com or BangGood
- 5V DC power supply converter module Amazon.com or BangGood
- Metal film resistors Amazon.com or BangGood
- Jumper cable set
- Breadboard wiring (Arduino and Raspberry Pi compatible) Amazon.com or BangGood
- Solderless breadboards Amazon.com or BangGood
- NPN 2N2222 switch transistors (optional) Amazon.com or BangGood
Get the Microelectronics Starter Kit from Amazon.com or BangGood
Arduino IDE sample code
Relay switch modules use a digital output pin on an Arduino. Here’s sample code for the Arduino IDE to demonstrate how to control a relay switch module using an Arduino board:
// Define the pin number to which the relay module is connected
const int relayPin = 2;

void setup() {
  // Set the relay pin as an output
  pinMode(relayPin, OUTPUT);
}

void loop() {
  // Turn on the relay for 2 seconds
  digitalWrite(relayPin, HIGH);
  delay(2000);

  // Turn off the relay for 2 seconds
  digitalWrite(relayPin, LOW);
  delay(2000);
}
In this code, the relay switch module is connected to digital pin 2 of the Arduino board. The setup() function is executed once when the board starts up and is used to initialize the pin mode of the relay pin as an output. The loop() function is then executed repeatedly.
Inside the loop() function, the relay is turned on by setting the relay pin to HIGH using the digitalWrite() function. The relay stays on for 2 seconds, as specified by the delay() function. Then, the relay is turned off by setting the relay pin to LOW, and there is another 2-second delay.
This code creates a simple on-off cycle for the relay, but it can modified according to specific requirements.
Conclusion
Relay switch modules are used as high-voltage AC switches by using low-voltage DC as a trigger. The heart of these modules are 5 pin Songle relay switches.