In the era where social media plays a major part in online marketing, email marketing still plays an integral part in getting information to potential audiences.
Table of contents
Introduction
Not all people use social media, but even if they do, new content notifications might still get lost in a sea of posts. To ‘never miss a post’, email marketers also use ‘newsletters’ or ‘mailing lists’ to inform their audiences of new content.
In addition to targeting a, sometimes broader, more reliable audience, with a mailing list, compared to other people’s social media sites, you also have full control over making promises about what you’ll offer them if they sign up for it – i.e. ‘Like our page’ for some reasons might not fall in Facebook’s allowable policies.
MailChimp has a lot of features that make it a great tool in your email marketing arsenal. This post shows how to use MailChimp to send automatic post notifications using an RSS feed.
- Get the LG 22MK430H-B 21.5″ Full HD Monitor from Amazon.com
- Get the ROCCAT Burst Pro PC Gaming Mouse from Amazon.com
- Get the Corsair K95 RGB Platinum XT Mechanical Gaming Keyboard from Amazon.com
- Get the ASUS TUF Gaming F15 Laptop from Amazon.com
MailChimp and RSS feeds
MailChimp is an online email marketing service aiding in sending bulk emails. Their RSS email campaigns automatically pull in content from your feed and deliver it to your contacts on a daily, weekly, or monthly basis. With MailChimp, RSS email campaigns integrate with any of your current Lists and templates.
To create an RSS email campaign you will need an RSS feed URL address. Most modern websites have built-in RSS feeds containing a summarised version of the website’s content pages. With WordPress websites, the RSS feed address is simply www.your-site-name.com/feed. The feed’s URL address can be copied and pasted from your internet browser’s address bar.
Creating a MailChimp RSS email campaign
After logging into your MailChimp account using your username and password, the steps for setting up a new RSS feed campaign are as follows:
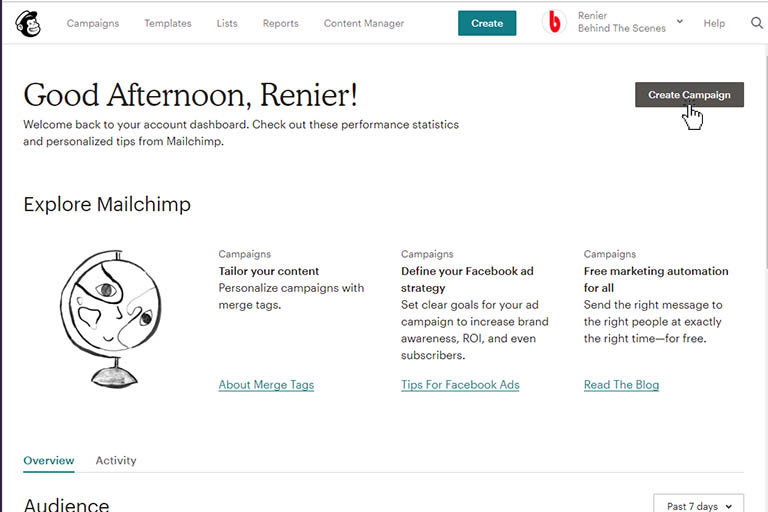
1) From the MailChimp Dashboard, click on the Create Campaign button and choose Email.
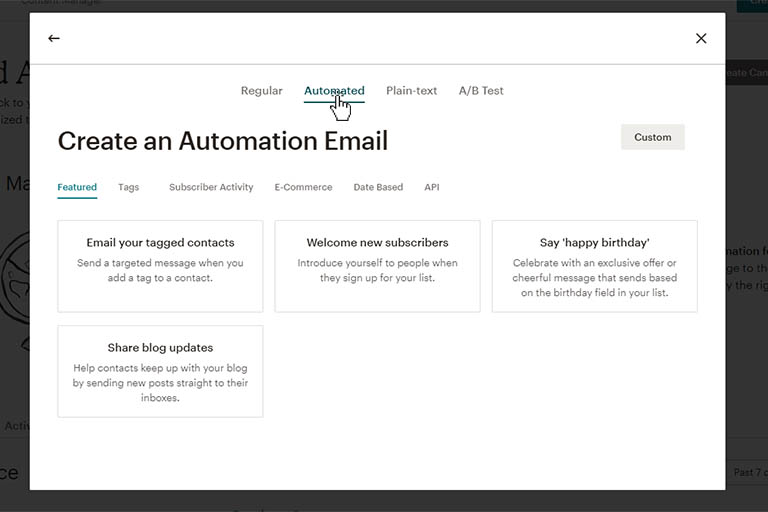
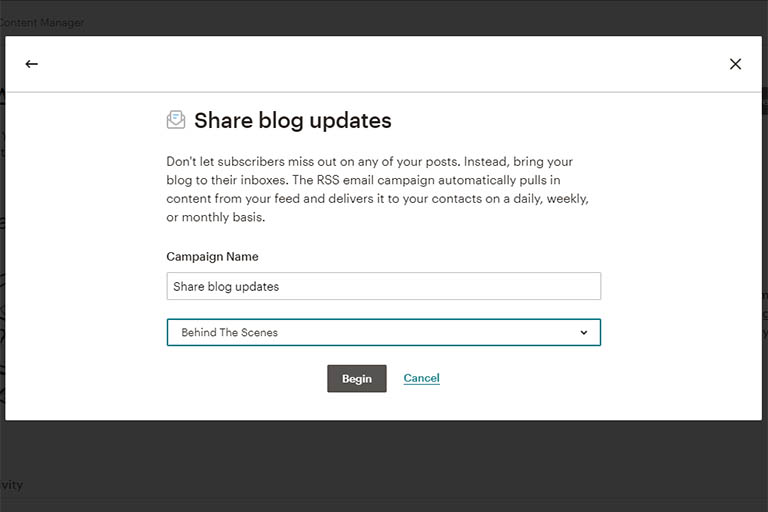
2) From the Email section, choose Automated and then Share blog updates.
3) Name the campaign, choose the List the campaign must use and click on the Begin button.
The MailChimp campaign building process will now appear.
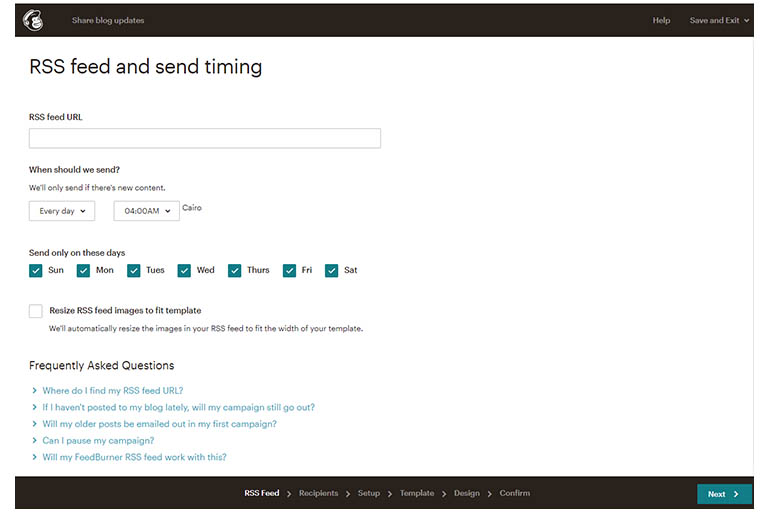
4) Supply the RSS feed URL set the schedule (see below) and press the Next > button.
Looking at the timing of sending emails, remember that a free MailChimp account will only send out 12 000 emails per month. The RSS email campaign will only send out emails if new content was found. If you do the maths correctly, this means that you can’t have a list of, for example, 500 emails and expect MailChimp to deliver them every day for 30 days. I usually do a weekly schedule at an appropriate time.
5) Follow the rest of the MailChimp campaign builder process.
MailChimp will now take you through their standard campaign-building process. You can follow the setup progress at the bottom of the screen and move to the next step by using the button on the bottom right of the screen. As you move along, MailChimp will help with little tips in certain places.
Keep it simple – you can always create a new campaign later again. Get the campaign up and running first to see the results in your own inbox. MailChimp will guide you through the entire process and help you to revise your campaign at the end.
Editing a MailChimp RSS email campaign
To edit your RSS email campaign, you need to Pause it first. Alternatively, you can create another RSS email campaign and delete the old one.
Conclusion
MailChimp offers a lot of features for email marketers. The RSS feed can be used to automatically post notifications.

