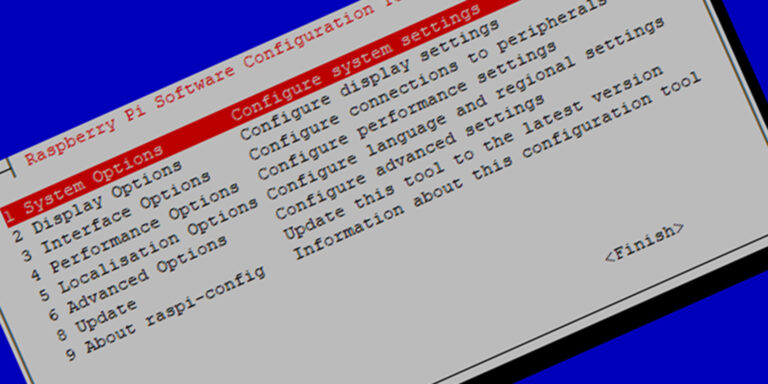
There are a couple of things to do to get better functionality out of the Raspberry Pi. The Raspi-config tool is the first place to start.
Table of contents
Introduction
The Raspberry Pi has a lot of functionality in the form of hardware and software. Some of these functionalities are dependent on the Raspberry Pi Model used, the operating system used, the location of the user, the external hardware used and, of course, the requirements of the user.
Important configuration options include changing the default username and password, expanding the filesystem, language and regional settings, display and audio settings and activation of hardware ports.
All these and more can be done using the Raspberry Pi (Software) Configuration tool (aka Raspi-config or the Raspi-config tool).
It is important to go through the Raspi-config tool at least once after the operating system has been installed. This post will show how to access Raspi-config and go through and explain the important items.
- Get the Raspberry Pi 4B 4GB Starter Kit from Amazon.com
- Get the Raspberry Pi 4B 8GB Starter Kit from Amazon.com
Requirements & assumptions
For its first boot, it’s best to have the Raspberry Pi connected to a screen, keyboard and mouse. It is important to have a connection to the internet for the Raspberry Pi first-time setup.
The Raspberry Pi can be easily connected to a local area network (LAN) with internet access using an Ethernet cable, but a Wi-Fi connection can also be configured (see later).
After the initial setup, the Raspberry Pi terminal can be accessed using PuTTY over a network.
Raspi-config tool
The Raspberry Pi is configured using the Raspberry Pi Configuration Tool and is available on both the Desktop and Lite versions of Raspberry Pi operating systems and can be accessed using a terminal command and/or from the Desktop’s main menu.
The Raspi-config tool is in the form of a menu when accessed from the terminal and/or has a windowed appearance when accessed from the Desktop.
Note that the order and grouping of the layout of Raspi-config might differ slightly depending on the Raspberry Pi distribution use. On newer distributions, some of the settings (e.g. Bluetooth and Wi-Fi) can also be configured without using the Raspi-config tool.

The Raspberry Pi (Software) Configuration Tool. Also called Raspi-config. Over time Raspi-config has changed and the order of the menu items might look different on different distributions.
Accessing Raspi-config from the terminal
When the Lite version of Raspbian is installed, it will boot straight into the terminal asking for a username and password.
The default username:password for Raspbian is pi:raspberry.
The terminal can also be accessed from the Desktop by using a mouse and clicking on the Terminal icon.
.
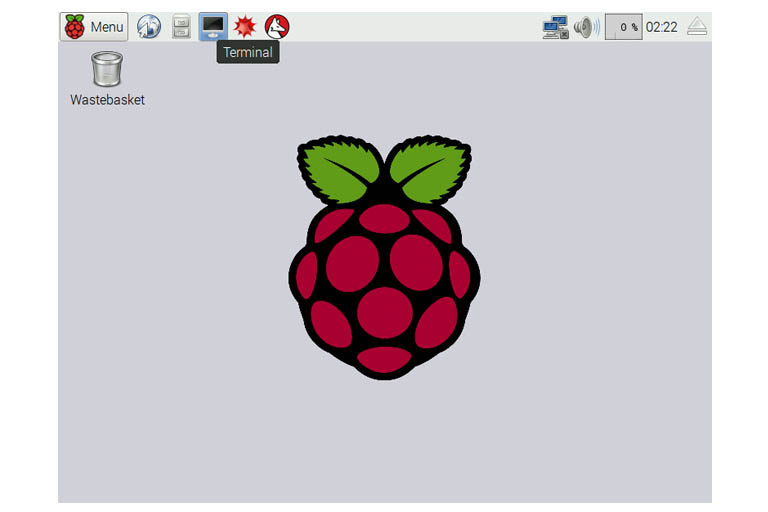
Raspbain Jessie Desktop/GIU interface. Access to the terminal is gained by using the terminal icon on the top of the screen.
To access the Raspi-config tool from the terminal, the following command is used:
sudo raspi-config
The terminal version of Raspi-config is in the form of a menu where each menu item represents a group of configuration settings.
The arrow keys on the keyboard are used to navigate between the menu items. The Enter key is used for selection and the Esc key is used to cancel certain options, go back, and exit Raspi-config.
Accessing Raspi-config from the desktop
When the Full Desktop version of Raspbian is installed, it will boot into the GUI. From here, Raspi-config can either be accessed using the terminal or by choosing it from the Applications menu under Preferences.
On the Desktop, the Raspi-config tool is situated under Raspberry Pi Configuration under Preferences in the Applications menu.
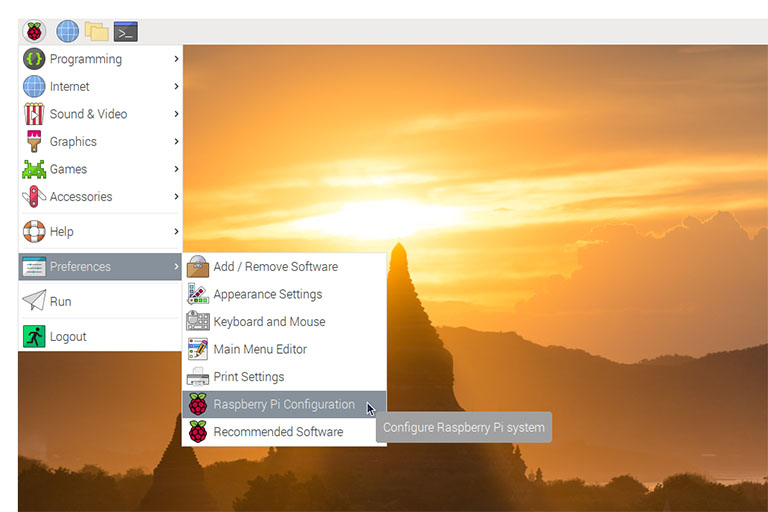
On the Desktop, the Raspberry Pi Configuration Tool is situated under Preferences in the Raspberry Pi Applications menu. In this case, Raspbian Buster was used.
Settings on the Desktop version of Raspi-config is changed using a mouse and keyboard.
First boot
On some Raspberry Pi distributions, the very first Desktop boot might open some Raspi-config options automatically. Known ones include extending the file system, changing the username and password, underscan/overscan, and localisation settings. They can be set here and/or later again.
Raspi-config settings
It is important to go through each menu item of the Raspi-config tool. Some settings are more important than others.
Update Raspi-config
It is important to Update the Raspi-config tool to its latest version before setting any of the other settings. To update Raspi-Config, select Update from the main menu. On some distributions, the update item is situated under Advanced Options.
An internet connection is required to update the Raspi-config tool. If internet access is only available through Wi-Fi, it needs to be configured before updating the Raspi-config tool (see later).
Other important configuration options include expanding the filesystem, network configuration, username and password and audio settings, display settings, localisation settings and activation of hardware ports.
Some settings are highly recommended, some are optional, and some are required.
Expanding the filesystem
When installing an operating system for a Raspberry Pi, a portion of the MicroSD card will be unused. To ensure that all the space of the SD card is available for Raspbain, the filesystem should be expanded.
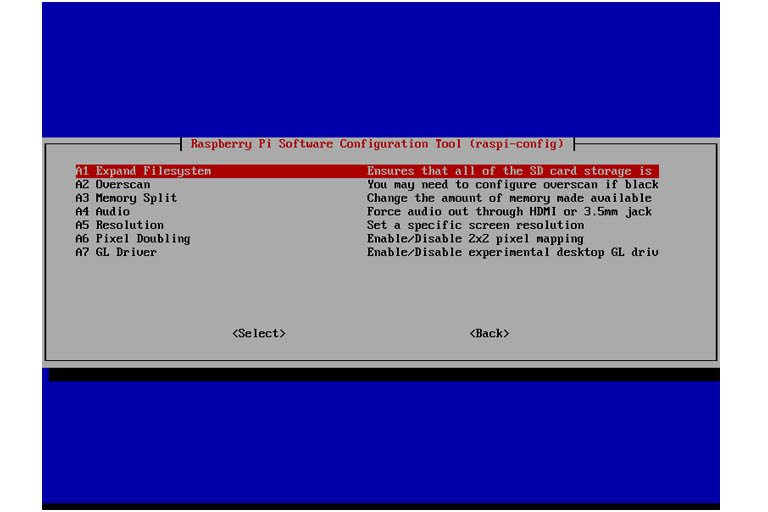
Expanding the Filesystem Choosing this option will expand the installation to fill the rest of the SD card, giving more space to use for files.
The Expand Filesystem menu item is either available on the main menu or under the Advanced Options menu.
Network configuration
Network configuration options include setting up Wi-Fi and enabling SSH.
Depending on the distribution used, the network options are either grouped under the Network Options menu item or under the System Options menu item on the main menu.
Note that when the Raspberry Pi is connected to a LAN, a dynamic IP address will be automatically created.
Setting up Wi-Fi (Wireless LAN)
As from Raspbian Stretch, the Raspi-config tool can be used to set up Wi-Fi. The wireless LAN settings are usually set under Network Options -> Wi-Fi, but might also be situated under System Options on some distributions.
To set up Wi-Fi, the country, the network name (SSID) and password (also called the passphrase or pre-shared key) need to be entered.
The configuration settings for wireless connectivity is stored in the /etc/wpa_supplicant/wpa_supplicant.conf file.
It might be easier to set a Wi-Fi connection using the Desktop instead.
Enabling SSH (optional)
SSH (Secure Socket Shell) is a network protocol that provides a secure way to access a remote computer (in this case the Raspberry Pi) by using username/password authentication. On some Raspbian distributions, SSH is enabled by default.
When a ‘connection refused’ error is received when trying to connect with, for example, PuTTY or WinSCP, try enabling SSH first. SSH will pose a security risk if it is not used, in which case it is better to disable it.
SSH can be enabled/disabled under Interfacing Options -> SSH or Advanced Options -> SSH.
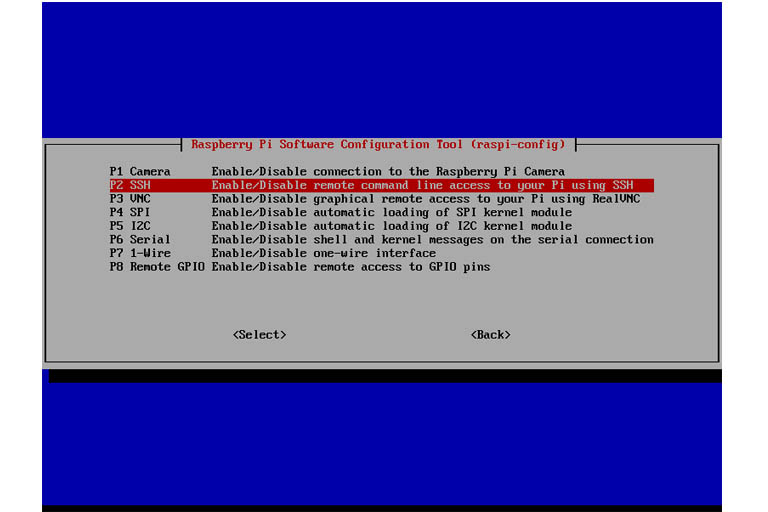
Connecting to a local network with SSH enabled (see later) will give, amongst other things, terminal access to the Raspberry Pi by using PuTTY.
Changing the default password
By default, a user with the username of pi with a password of raspberry will be created as the first user. This user has root/sudo privileges which will give full administrative permissions to the person who is logged in.
The Change User Password menu item will allow the logged-in user to change the login password. Changing the password, especially for the user ‘pi’, adds to the security of the Raspberry Pi.
The next time the user is prompted for a username and password, this password will be accepted instead.
Default audio output
The default audio output will be set to either auto or HDMI. The Raspberry Pi can also be forced to only use the 3.5 mm (headphone) audio jack or the HDMI port.
The audio output hardware settings are either situated under Advanced Options -> Audio or under the System Options menu item.

Depending on the hardware available, the Raspberry Pi can be configured to used HDMI or the 3.5mm audio jack for sound.
The audio output hardware settings are stored in the /boot/config.txt file.
Display settings
Raspberry Pi display options include resolution settings and underscan (overscan).
Depending on the distribution used, the display option items are either grouped under the Display Options menu item or under the Advanced Options menu.
Resolution settings
The resolution is a measurement of the sharpness and clarity of an image. It is mainly dependent on the display device (e.g. TV, computer screen, etc.). Higher resolutions need more processing power from the Raspberry Pi, so setting the correct resolution is important for speed too.
In most cases, the default resolution will be fine, but 720p @60Hz will be more than enough if a choice has to be made. Smaller resolutions might be more fitting for older or atypical screens. Being able to display 4K resolution, the Raspberry Pi 4B might have some performance issues on 4K screens — in which case the resolution can be adjusted.
The output resolution of a Raspberry Pi is set under the Resolution menu item.
Raspberry Pi 4B
The Raspberry Pi 4B is known to have some issues with its resolution settings. It typically only accepts the highest resolution of the display device, which is mainly a problem with 1080p and 4K displays.
The problem with the Raspberry Pi 4 is that the Raspi-config Resolution setting might not work as expected and needs to be set manually using the boot configuration file (config.txt) using terminal commands.
To do this, the resolution settings are manually set as the HDMI group (HDMI_group=) and HDMI mode (HDMI_mode=).
There are two HDMI groups:
- Group 1: CEA (Consumer Electronics Association) typically used for TVs
- Group 2: DMT (Display Monitor Timings) typically used by computer monitors
The line to add in the config.txt file will look something like this:
HDMI_group=1
or
HDMI_group=2
After determining the HDMI group, decide what resolution to use. This will be set by HDMI mode.
Note: Mode 95 and Mode 97 is for Raspberry Pi 4Bs only. Mode 95 is for when both HDMIs are used. To use Mode 97, hdmi_enable_4kp60=1 must be set in the config.txt file.
To edit the config.txt file use:
sudo nano /boot/config.txt
The lines should be added after the last entry of the file. To, for example, use a CEA screen at a resolution of 1280×720 @ 60Hz the two lines to add will look as follows:
HDMI_group=1
HDMI_mode=4
After the HDMI mode and group have been set, press Ctrl + X keys to exit, then Y for yes, followed by the Enter key.
The new resolution setting will take effect after rebooting the Raspberry Pi:
sudo reboot
If, for any reason, the display stops working after the change, holding down the keyboard’s Shift key while the Raspberry Pi boots will ignore the boot configuration file and load the default settings.
Correcting overscan/underscan
Overscan (in the form of disabling underscan) might, or might not create a fuller image if there is a border around the screen. It will also allow compensation for screens using overscan.
Default language, location (time zone), keyboard settings & Wi-Fi country
The localisation settings will set the default language, time zone and keyboard layout for the Raspberry Pi.
Choose Localisation Options (or Internationalisation Options for Raspbian Wheezy) and go through the menu items one by one.
Change Locale will set up language and regional settings and Change Timezone will set the clock offset (difference) from Coordinated Universal Time (UTC) determined by your country. More than one language can be selected, after which the default language will be asked. As a South African, I usually choose UTF-8 en_ZA.
For the Change Keyboard Layout menu item, I usually choose the Generic 105-key (Intl) PC setting and then when prompted next under Keyboard Layout I choose English (US). I don’t use keyboard functions so I just choose the default settings there.
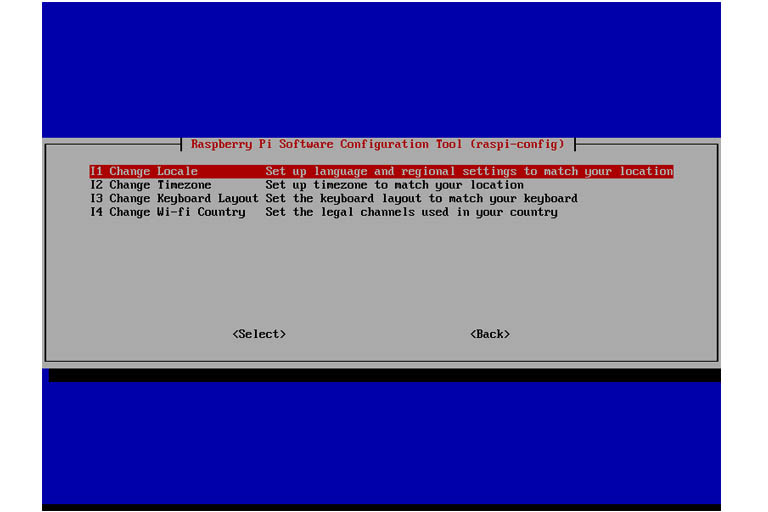
The localisation options menu has items for the locale, timezone, keyboard layout and Wi-Fi country.
The Change Wi-Fi Country option is only available from Raspbain Jessie.
After these settings have been configured, use the Back option to enter the main Raspi-config menu again.
Changing the hostname
The hostname is used as the name of the Raspberry Pi and is used to identify it on a network. By default, each Raspberry Pi is named raspberrypi. To avoid network clashes, each computer/Raspberry Pi on a network should have a unique hostname.
The hostname is not the username. The hostname can be changed in Advanced Options -> Hostname or Network Options -> Hostname. This will change the visible name of the Raspberry Pi on a network (e.g. from pi@raspberrypi ~$ to pi@yourhostnamehere ~$).
Activating the camera module (optional)
To be able to use the Raspberry Pi camera module, the camera connection port needs to be activated. With the Raspi-config tool, the camera connection is either enabled under Interfacing Options -> Camera or Enable Camera.
Finalising
After all the settings have been configured, the Raspi-config tool can be exited by selecting the Finish option. Even if the Rapi-config tool does not ask for it, it is always recommended to reboot the Raspberry Pi afterwards.
sudo reboot
Doing system updates (recommended)
Before moving on from the first-time setup, Raspbian should be updated. This can be done before or after rebooting (mentioned in the previous step). Running updates regularly on the Raspberry Pi ensures that all the software packages are up to date.
This will ensure smoother operation, fewer security vulnerabilities, and better compatibility. To be able to update Raspbian packages, a connection to the internet is required.
Raspbian is updated with the following two terminal commands.
sudo apt-get update
sudo apt-get upgrade
Conclusion
This post discussed the Raspberry Pi first-time setup. Hardware and operating system-related configuration can be accessed using the Raspi-config tool.
It is important to go through the Raspi-config tool at least once after the operating system has been installed.

