By installing a cooling fan on the TEVO Tarantula 3D printer, printing material such as PLA sets faster - ultimately improving the print quality.
Table of contents
Introduction
By installing a cooling fan on the TEVO Tarantula 3D printer, printing material such as PLA sets faster — ultimately improving the print quality.
The stock TEVO Tarantula does not include parts for a cooling fan (aka filament layer cooling fan or simply layer fan). In many other 3D printers, this fan is typically situated on the extruder end. Softer materials, such as PLA, take a little longer to set (cool down) and can easily bend or warp upon adding a new print layer on top of it.
For a quick introduction to installing a cooling fan on a TEVO Tarantula, see the YouTube video below.
PLA that does not have enough time to cool down often leads to warping of prints — even more prominent in small prints and/or at high printing speeds. The quality of bridging can also be improved by allowing less time to sag.
The process of installing a cooling fan on a TEVO Tarantula is fairly easy and only a few parts are required: a cooling fan, a fan duct (3D printable) and 4 x 12mm M3 socket screws.
Apart from installing a cooling fan on a TEVO Tarantula 3D printer, there are also other upgrades to improve the quality of 3D prints.
- Get the Creality 3D Ender-3 3D Printer from Amazon.com or BangGood
- Get the M3 Stainless Steel Socket Head Machine Screws from Amazon.com
Cooling fans
The first item required for this upgrade is the cooling fan itself. This layer fan is installed onto the extruder unit using a fan duct (see below) which allows the fan to be directed downwards onto the printing area.
There are two options when it comes to choosing a cooling fan for the TEVO Tarantula: 4010 brushless fan or a 5015 radial fan.
The TEVO Tarantula is powered using a 12V power supply, so the cooling fan needs to be 12V too.
- Get the 12V Brushless 4010 Cooling Fan from Amazon.com or BangGood
- Get the 12V Radial 5015 Turbo Blower Cooling Fan from Amazon.com or BangGood
- Get the 12V Brushless 3010 Cooling Fan from Amazon.com or BangGood
In the case where a MOSFET has been installed, the 40mm fan situated on top of the mainboard can be temporarily relocated for this purpose. I also managed to use salvaged and spare screws from the stock Tarantula. All the original screws with the Allan key can also be used.
The fan duct
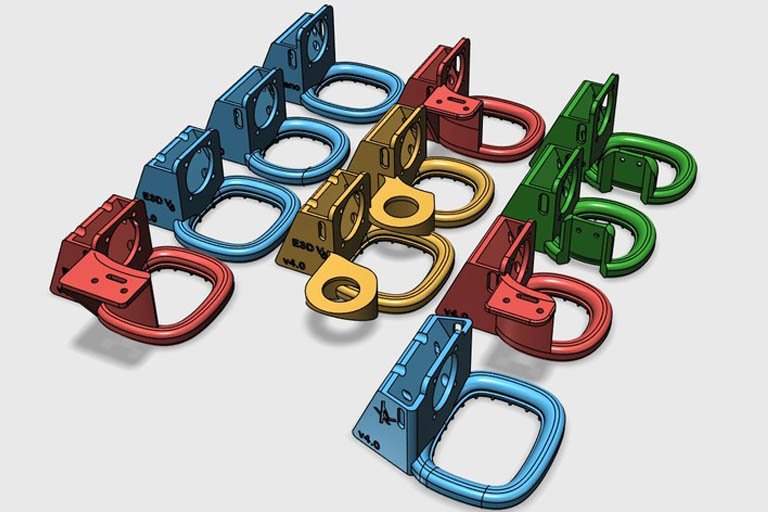
The fan duct is where the fan will be mounted to. A working solution for me was an appropriate model from the LPA FanDucts for Tevo Tarantula – v4.0 (recently upgraded to v5.0) done by Elzariant. It contains a set of fan ducts suitable for various versions/setups of the TEVO Tarantula.
The download file contains model options for different sized ducts, single or double extruders, attachments for an auto leveller and different fan sizes. All these models are installed on top of the current extruder fan.
Conclusion
3D prints with the TEVO Tarantula can be significantly improved by installing an additional cooling fan on the extruder end.
Fan parts are easily obtainable and the fan duct can be 3D printed using the TEVO Tarantula itself. To get started no additional parts have to be ordered, but parts used need to be replaced over time.


