

A Raspberry Pi used as a web server can be accessed via a web browser using HTTP. Here we show the full process of using the Raspberry Pi as a home web server.
Table of contents
Introduction to using the Raspberry Pi as a home web server
A web server is a computer that can send and receive data via a web browser using the Hypertext Transfer Protocol (HTTP) — the basic network protocol used to distribute text-based information on the internet. A Raspberry Pi can be used to run the required software to be used as a small functional HTTP web server.
In this post, we will show how to install and configure a LAMP web server (running Linux, Apache, MySQL and PHP) on the Raspberry Pi OS (formerly known as Raspbian). Ultimately, it will be configured to host a website with a start page. This website will be accessible by any device with a web browser that is connected to the same local network (LAN).
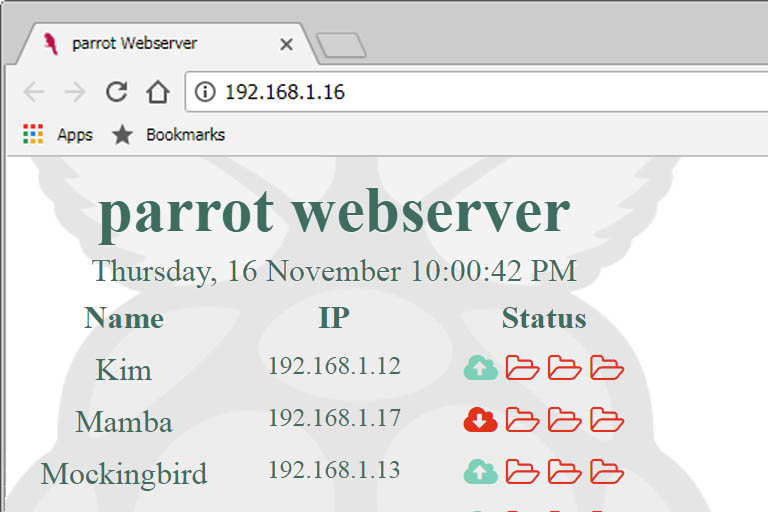
A Raspberry Pi web server can be accessed from any web browser connected to a LAN. This is a sample main page of my own home automation web server.
Almost anything that can be hosted on a regular web server can also be hosted on a Raspberry Pi web server — including a WordPress website. Home web servers can be useful for learning, home automation projects and website development and testing purposes.
- Get the CanaKit Raspberry Pi 4B 8GB Starter Kit from Amazon.com
- Get the GeeekPi Raspberry Pi 4B 4GB Starter Kit from Amazon.com
- Get the LG 22MK430H-B 21.5″ Full HD Monitor from Amazon.com
Assumptions and requirements
- Fully installed Raspberry Pi with the latest version of the Raspberry Pi OS. We used
- An active Ethernet or Wi-Fi connection to a local network with access to the internet
- Access to the Raspberry Pi, either directly, or by using PuTTY and WinSCP
Although a static IP address for the Raspberry Pi is not required, it is recommended. A static IP will standardise the address used to access the web server.
Don’t expect
- High traffic server
- High server speeds
- Great security
- Accessibility from the Internet
Installing the required packages
For a Raspberry Pi to be used as a web server it needs the correct software. For a LAMP web server, Apache, MySQL and PHP need to be installed. All these are free, open-source packages.
For the purpose of the latest version of this post, the full version of Raspbian Bullseye (32-bit) was used with a Raspberry Pi 3B connected over Wi-Fi. A new 16GB MicroSD card was freshly written using the Raspberry Pi Imagers. The Raspberry Pi Imager can also be used to set the hostname, SSH connectivity and Wi-Fi settings of the web server Raspberry Pi. The full version was installed to get fast access to setting a static IP address.
Before installing anything, make sure to update and upgrade the Raspberry Pi OS packages to their latest versions. Running updates regularly on the Raspberry Pi ensures that all the software packages are up to date.
This will ensure smoother operation, fewer security vulnerabilities, and better compatibility. To be able to update Raspberry Pi OS packages, a connection to the internet is required.
The Raspberry Pi OS can be updated with the following two terminal commands.
sudo apt-get update
sudo apt-get upgrade
Apache
Apache 2 HTTP server (Apache) is a popular web server software that can be installed on various operating systems. According to Wikipedia, Apache is globally the most used software for HTTP servers.
At the time of writing, the package was in its second version with distributions for most UNIX-based operating systems, including Raspbian. Apache is also needed to be able to use phpMyAdmin (see later).
Important features of Apache include:
- Listening for requests on TCP/UDP port 80 (more ports can be configured)
- Translating the path to the hostname/IP address
- Supports service-side scripting for which various scripting languages can be used
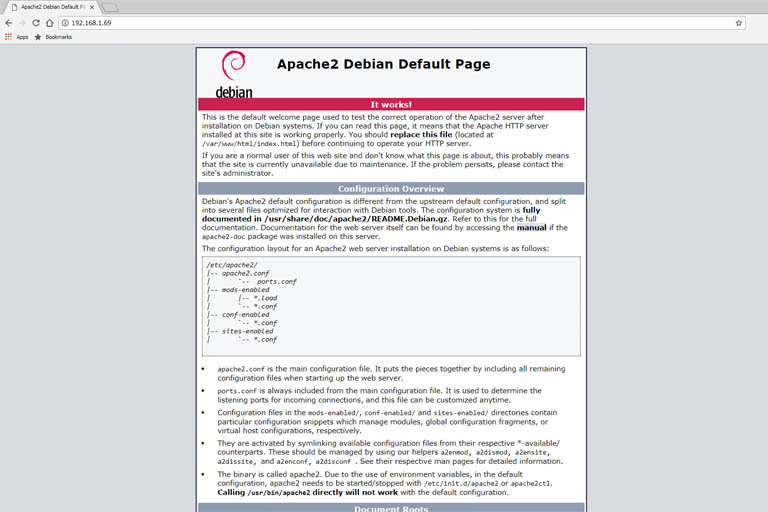
The default Apache Debian Page on a Raspberry Pi web server.
To install Apache, the following terminal command is used:
sudo apt-get install apache2
After Apache has been installed it will start to run automatically. It can be tested by using the IP as the URL in a networked computer’s web browser (e.g. Chrome, Firefox or Internet Explorer).
To get the latest IP address of the Raspberry Pi web server, the following command in the terminal can be used:
hostname -I
This IP address can now be used from the internet browser of a remote device to access the default start page of the web server (see below):
http://192.168.1.16
If the words ‘It works!’ appear on the page, it means the Raspberry Pi Apache home web server is up and running.
Apache will start automatically each time the Raspberry Pi boots up, but can be started and stopped with the following terminal commands:
sudo service apache2 start
and
sudo service apache2 stop
The start page (index.htm)
After Apache has been installed, it will create a start/test HTML file (index.html) in the web directory of the Raspberry Pi (/var/www/html).
The start page, also referred to as the main or index page is the first or highest indexed web page of a website. It is where everything begins. When the web server address is typed into a connected web browser, the start page will appear.
The start page is generally used as a portal to the rest of a website and supplies links to other pages on the website. Depending on the purpose of the website, the start page can also be used to give the most important information about the website and/or supply direct access to the most relevant functions of the web server or website.
MariaDB/MySQL
MySQL (pronounced “my-s-q-l” or “my sequel”), short for Structured Query Language, is a database management system. By storing and securing its information, MySQL can be a central component of the LAMP web server. In this case, MariaDB will be used as the MySQL infrastructure.
Not all developers will require MySQL. It must also be said that data stored in a SQL database can also be obtained from a different/remote server (e.g. one that is on a different Raspberry Pi that is connected to the same LAN).
This section will go through installing the database management system and configuring it to be used with Apache.
MySQL
Originally MySQL was the default database server among Linux systems but it has since been replaced by MariaDB. For Raspbain Stretch and earlier, MySQL can still be used. For Raspbain Buster and newer, MariaDB should be used.
To start installing MySQL, the following terminal command is used:
sudo apt-get install mysql-server
If MySQL is used, take note that the user might be prompted for a “root” user password during its installation process. This password is case-sensitive. MariaDB will not ask for a ‘root’ user password at this stage.
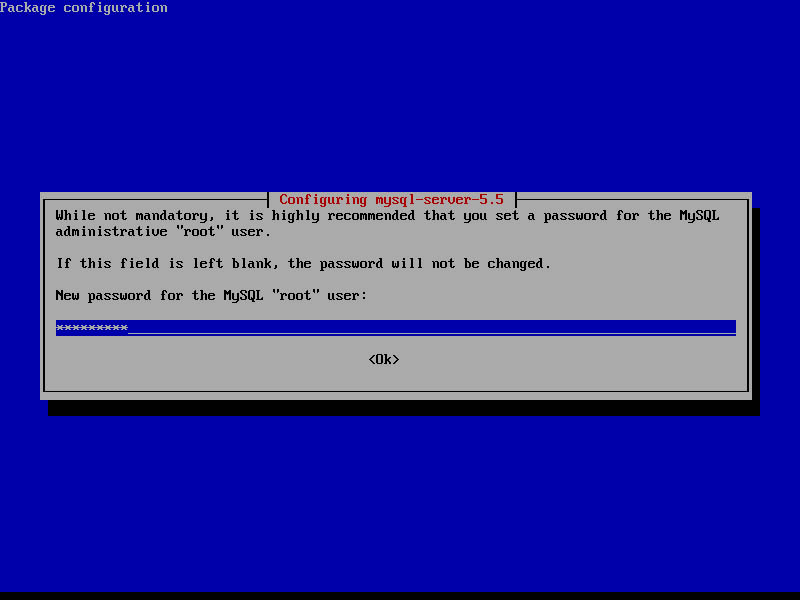
MySQL asks for a ‘root’ user password during the installation process.
The ‘root’ user password set here has nothing to do with the username and password used to gain access to the Raspberry Pi. It is also a different password used for the ‘root’ user of phpMyAdmin (see later).
The password set here is the administrative password that has full access to MySQL and its databases. If security is an issue, the ‘root’ user password for MySQL needs to be strong and kept secret from other users.
The ‘root’ user can create SQL databases and set privileges for other database users. Later, the MySQL ‘root’ user password will be required again, so choose a separate, secure password and keep it safe.
MariaDB
To install MariaDB on a Raspberry Pi, the following apt-get terminal command can be used:
sudo apt-get install mariadb-server
Once the installation is finished, the service will start automatically.
From here onwards, it will be assumed that MariaDB was used. When MySQL was used instead, the commands that follow mariadb can be replaced with mysql.
Just like with Apache, MariaDB will start automatically each time the Raspberry Pi boots up, but can be started and stopped with the following terminal commands (not required, but good to know for future reference):
sudo service mariadb start
and
sudo service mariadb stop
To be able to connect to a MariaDB CLI, MariaDB client needs to be installed:
sudo apt-get install mariadb-client
Before moving on to the next section, Apache needs to be restarted:
sudo service apache2 restart
Before installing PHP (see below), it is a good idea to reboot re Raspberry Pi. The following terminal command can be used:
sudo reboot
PHP
PHP, short for Hypertext Preprocessor, is a server-side scripting/programming language designed primarily for web development. It is more dynamic than HTML, can be embedded into HTML and can be used to make requests to MySQL databases.
To allow Apache to process PHP programming, PHP and a PHP library package need to be installed. To allow connections to be made to a MySQL Server (local or remote) through PHP, a package for MySQL also needs to be installed. The latest version of PHP is 5.
Depending on the distribution of Raspbian, PHP might or might not already be installed. To see if, and what version of, PHP is installed, the following terminal command can be used:
php -v
If there is no version of PHP (i.e. the PHP command gives an error), PHP together with the PHP MySQL extension needs to be installed:
sudo apt-get install php -y
sudo apt-get install php-mysql -y
sudo apt-get install libapache2-mod-php
Additional packages
There are various additional packages that can be used to add to or extend the functionality of LAMP web servers. These packages are not required for the initial server installation but might become necessary at a later stage.
php-dev is a package that provides supporting files for PHP module development.
sudo apt-get install php-dev -y
The mysql-client package adds functionality to allow a connection to the MySQL server through the CLI.
sudo apt-get install mariadb-client
phpMyAdmin is a package that allows connections to its MySQL server through a web browser. The connection to the MySQL server can be made through any computer that is connected to the same local network. phpMyAdmin makes database queries, management and backups easy.
For phpMyAdmin to function, Apache needs to be installed first (see earlier). phpMyAdmin is only useful/functional when installed locally on the same Raspberry Pi where the MySQL server has been installed (i.e. these related steps are not required locally when a remote MySQL server is going to be used).
sudo apt-get install phpmyadmin -y
Next, phpMyAdmin needs to be configured to connect to the MySQL server. Details for connecting to phpMyAdmin also need to be configured.
When prompted to configure phpMyAdmin during the installation process, choose apache2 (default option). TheEnter key will select the option and continue with the installation process.

Configuring phpMyAdmin. apache2 is selected.
Details to log into phpMyAdmin will also be required. When asked to ‘Configure database for phpmyadmin with dbconfig-common?’, choose <Yes>.
Note that the administrative account password for phpMyAdmin (i.e. the “root” password) is not the same password that was used to secure MySQL (mentioned in the MySLQ section earlier). It is best to set this password to something different to your ‘root’ SQL password.
This password is case-sensitive. If security is an issue, the ‘root’ user password for phpMyAdmin needs to be strong and kept secret from other users.

After installing phpMyAdmin, its config file needs to be added to Apache’s config file.
To make a backup of Apache’s original config file, use the following terminal command:
sudo cp -p /etc/apache2/apache2.conf /etc/apache2/apache2.conf.original
To add the phpMyAdmin config file to Apache’s config file, open Apache’s config file:
sudo nano /etc/apache2/apache2.conf
and add the following two lines at the bottom:
# Manually added phpMyAdmin code
Include /etc/phpmyadmin/apache.conf
After exiting and saving (Ctrl + X then Y), Apache should be restarted with:
sudo /etc/init.d/apache2 restart
To open phpMyAdmin in a web browser, type in the IP address of the Raspberry Pi web server, followed by /phpmyadmin, e.g.:
http://192.168.1.16/phpmyadmin

The ‘root’ password will not work at this point. By default, phpMyAdmin blocks the ‘root’ user from logging into the PHPMyAdmin interface. To be able to log into phpMyAdmin and create and access data tables, a new user will need to be created.
This is done using the Maria DB/MySQL command line interface (CLI), which was installed earlier. The ‘root’ user will be used to log into the CLI:
sudo mysql -p -u root
It will ask for the ‘root’ user’s password for accessing MySQL. In the case where MariaDB was used, the password will be empty.
Now run the command below to create a user and permit it to access all databases on the MySQL server. Remember the details you enter here as you will use these to log in to PHPMyAdmin.
Make sure you replace “username” with the username of your choice. Also, replace “password” with a secure password of your choice:
GRANT ALL PRIVILEGES ON *.* TO 'username'@'localhost' IDENTIFIED BY 'password' WITH GRANT OPTION;
To exit, the MySQL privileges needs to be fluhed:
FLUSH PRIVILEGES;
then type in exit and press Enter again.
The “username” and “password” will now be able to log into phpMyAdmin.
Remove unused packages
Some unused packages will be installed during the setup of the LAMP server. To uninstall these packages, the following terminal command can be used:
sudo apt autoremove
The www directory
The Apache installation will automatically create a start page (index.html) in the default www directory. This directory will also be used to store other related pages of the website. The default www directory for Raspbian Jessie is /var/www/http/(and /var/www/ for Raspbian Wheezy and later).
Conclusion
A Raspberry Pi used as a web server can be accessed via a web browser using HTTP. Here we showed the full process of using the Raspberry Pi as a home web server.