Since its release in 1996 (more than 20 years ago), Quake 1 can still be enjoyed today. Reviving Quake with accelerated graphics on Windows 10 shows you how.
Table of contents
Introduction to Quake
With its, then, groundbreaking 3D graphics, revolutionised game engine and awesome multi-player mode, Quake (now known as Quake 1) is still fun to play alone, or with a few friends.
Although the full PC version of Quake can be purchased for a small price (e.g. Steam), this post will show how to use the latest Quake demo (Shareware 1.06) and turn it into the full version using the original CD. Overall, this method will make the game use the original music from the CD and add support for Windows and OpenGL.
To be able to enjoy the full version of Quake, you will need access to your own Quake CD. The Quake CD files will not be supplied, but a method to install them on your hard drive is shown at the end of this post.
This process has been tested on Windows 10 (64-bit), but will probably work for any Windows subsequent to Windows ME. An external USB CD ROM drive was also used.
- Get the Gigabyte GeForce GTX 1060 3GB GPU from Amazon.com
- Get the MSI GeForce GTX 1060 6GB GPU from Amazon.com
- Get the LG 22MK430H-B 21.5″ Full HD Monitor from Amazon.com
- Get the Corsair K95 RGB Platinum XT Mechanical Gaming Keyboard from Amazon.com
- Get the ROCCAT Burst Pro PC Gaming Mouse from Amazon.com
Installing Quake Shareware 1.06 for Windows 10
As is, the original Quake CD or the original Quake demo (shareware) will not install on Windows 10. To overcome this, the latest Quake Shareware 1.06 (installer v0.99a), which is distributed with a Windows installer, can be used instead. To turn the demo into the full version, files from the original Quake CD will be required (see later).
The shareware version of Quake will give access to the first episode of the game (Dimension of the Doomed). The full version of Quake has a total of four episodes and includes the end of the game.
Assuming c:/quake as the install directory (recommended), the shareware should be installed to c:/quake (the default location). It will install the executable files required to run the DOS version (quake.exe), GLQuake (glquake.exe) and WinQuake (winquake.exe). GLQuake and WinQuake are source ports of Quake (also called game engines). The DOS version of Quake will most likely not work in Windows 10, but WinQuake and GLQuake should be playable.
This shareware version of Quake can be uninstalled using the Windows Control Panel -> Uninstall a program.
Shell commands and command-line options
Quake and its source ports are best launched using shell command lines. Fortunately, the Windows Command Prompt can be used for this. To find the Command Prompt, search for cmd using Windows’ search function (situated next to the Windows icon in the bottom left of the screen).
In its simplest form, the game is launched by typing its executable (.exe) file and then the pressing the [Enter] key while in the Quake directory. Assuming Quake was installed in the c:/quake directory, the following set of commands can be used to, for example, launch WinQuake:
cd /quake [Enter]
winquake [Enter]
Quake was also built to be launched with various command-line options. These options are added after the executable command in the form of -'command option' [command input], e.g. quake -width 800. Multiple options can be used at the same time. Each source port of Quake (e.g. WinQuake, GLQuake, etc.) has its own set of command-line options. GLQuake can, for example, be launched using:
glquake -window [Enter]
The Quake Console
The Quake Console (or simply Console) allows for additional commands while in the game. Commands can vary from changing game settings to showing information. The easiest way to open (and close) the Console is by pressing the ~ key on the keyboard.
WinQuake
WinQuake (released in 1997) is a source port of Quake to make the game playable in Microsoft Windows (Win95/98 at that time). Although WinQuake does not make use of OpenGL, it allows for high-resolution video and windowed modes. WinQuake can be launched from the Command Prompt using:
winquake [Enter]
This will open WinQuake in full-screen mode. In the case where the launch window gets stuck, press Alt + Tab a couple of times until the window opens. Alternative video modes can be set under Video Options (under the Options menu).
GLQuake
GLQuake (released in 1997) is a source port of Quake that enables the use of the OpenGL graphics library. At the time of its release, the Glide API and full OpenGL were supported.
OpenGL is still used by modern graphic cards. Glide, on the other hand, was used with 3Dfx Voodoo graphics cards, which was discontinued around 1999. For those who still use a 3Dfx Voodoo graphics card, the old OpenGL32 driver can be used by copying opengl32.dll from the /opengl32.old directory to the main quake directory.
To use OpenGL as is, nothing has to be done. GLQuake can be launched from the Command Prompt using:
glquake [Enter]
This will run GLQuake in full-screen mode at the default resolution of 640×480 with a 16-bit colour depth. In the case where the launch window gets stuck, press Alt + Tab a couple of times until the window opens.

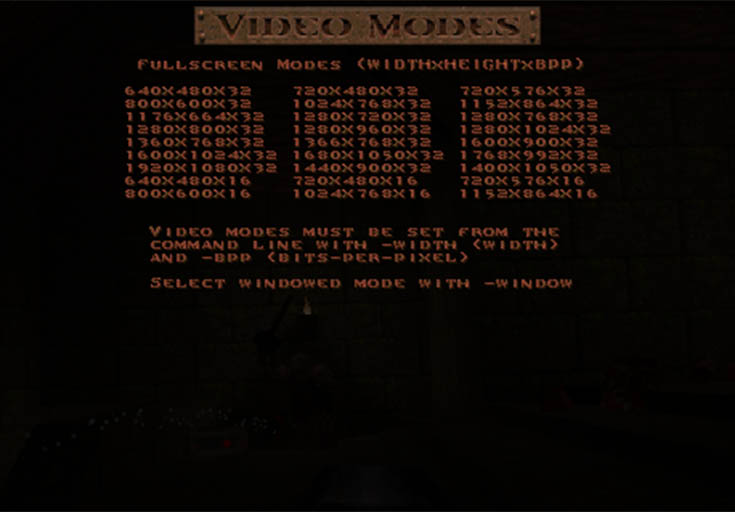
Video mode options are populated according to each PC’s graphics card. You might look different. To set the video mode, the exact width and height need to be used.
With GLQuake, different video modes are set using command-line options with -width, -height and -bpp (bits per pixel):
glquake -width 1280 -height 720 -bpp 32 [Enter]
To confirm the video mode, the following command can be used in the Quake Console:
vid_describecurrentmode [Enter]
GLQuake can also be launched in window mode by adding the -window command-line option.
Upgrading to the full version using the Quake CD and DOSBox
While the shareware version might bring back memories of the good old days and allow for basic tweaking, the full version of Quake is what we’re really after. Fortunately, the game can be upgraded by doing a one-off installation of Quake (from the CD) using DOSBox.
DOSBox is a free, x86 emulator which recreates the DOS environment in Windows.
For DOSBox to emulate the CD drive and directory structure correctly, they first need to be ‘mounted’. Assuming the Quake CD is inserted drive D:/, it is mounted in DOSBox as follows:
mount d d:/ -t cdrom [Enter]
Assuming the install directory for Quake is c:/quake, it is mounted as follows:
mount c c:/quake [Enter]
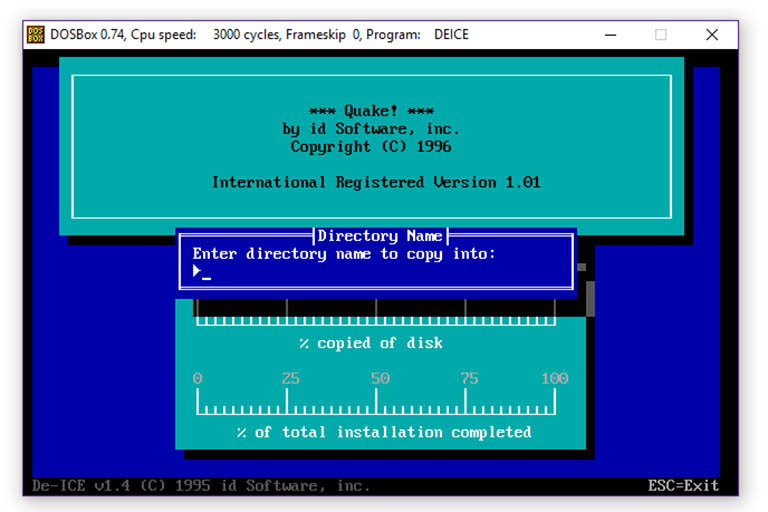
With the mounts specified above (i.e. the /quake directory mounted to DOSBox’s c:/ drive), the game should be installed on the root of the mounted C drive. To move to the CD ROM drive and to install Quake, the following DOSBox terminal commands are used:
d: [Enter]
install [Enter]

With the mounts specified above (i.e. the /quake directory mounted to DOSBox’s C drive), the game should be installed on the root of the mounted C drive, i.e. the “directory name to copy into” should be blank.
During the Quake installation, some files might need to be replaced (i.e. choose yes when prompted to overwrite files). After installation, the DOS version of Quake will be launched in DOSBox.
To exit Quake, use the quit command in the Console and to exit DOSBox, use the exit terminal command.
WinQuake and GLQuake can be launched as discussed earlier, but will now run the full version of the game. By keeping the game CD in the CD ROM drive, the original Quake CD soundtrack will be automatically used as music.
To uninstall the full version of Quake, the freeware version needs to be uninstalled (see earlier) after which the c:/quake directory is deleted.
Conclusion
The original Quake can be revived on Windows 10 using OpenGL. To do this, the latest Quake demo (Shareware 1.06) can be installed, updating the .exe file and turning it into the full version using the original CD.


What about level editors like QED?
Is the CD ROM working? What drive is it using?
Followed your directions precisely, but when I attempt to run either giquake.exe or winquake.exe I only get “You Must Have the Registered Version To Use Modified Games” I do have the original CD place in the CDROM drive, as well.
Advise Please….