

Keyboard shortcuts are a great way to increase the speed and efficiency of a software program. Here we discuss the use of keyboard shortcuts with Aseprite.
Table of contents
Introduction to using keyboard shortcuts in Aseprite
Computer shortcuts (aka hotkeys) are keys, or a combination of keys, on a computer keyboard that, when pressed, perform a task. As with any popular image editor, Aseprite offers the use of keyboard shortcuts to increase the speed and efficiency at which projects can be completed.
Microsoft Windows and other GUI operating systems, make it easy to use a traditional mouse to choose, select and take control of each aspect of Aseprite, but by using the keyboard with your other hand, many of its Tools and settings can be chosen without having to move the mouse pointer away from the actual workspace.
Keyboard shortcuts are either the way of pressing single keys or by pressing a combination of keys — usually starting with the Alt, Ctrl and/or Shift keys.
If the default shortcut keys for Aseprite are not desired, Aseprite allows for mapping your own shortcut keys or importing saved shortcut keys. This post can also be used to reference the common keyboard shortcuts for Aseprite.
- Get the Wacom Intuos wireless tablet from Amazon.com
- Get the XENCELABS Drawing Tablet from Amazon.com
- Get the Corsair K95 RGB Platinum XT Mechanical Gaming Keyboard from Amazon.com
- Get the ROCCAT Burst Pro PC Gaming Mouse from Amazon.com
- Get the LG 22MK430H-B 21.5″ Full HD Monitor from Amazon.com
Aseprite’s default keyboard shortcuts
Aseprite’s default keyboard shortcut keys can be viewed in one of four ways:
- Each main menu item and its options will have an underlined letter. These, as with any Windows program, can be accessed by holding down the Alt key while pressing the underlined letter. The next item inside a menu item can be selected by simply pressing its corresponding underlined letter. For example, pressing Alt + F will open the File menu, and while still inside the file menu, by pressing S, the Save option will be selected.
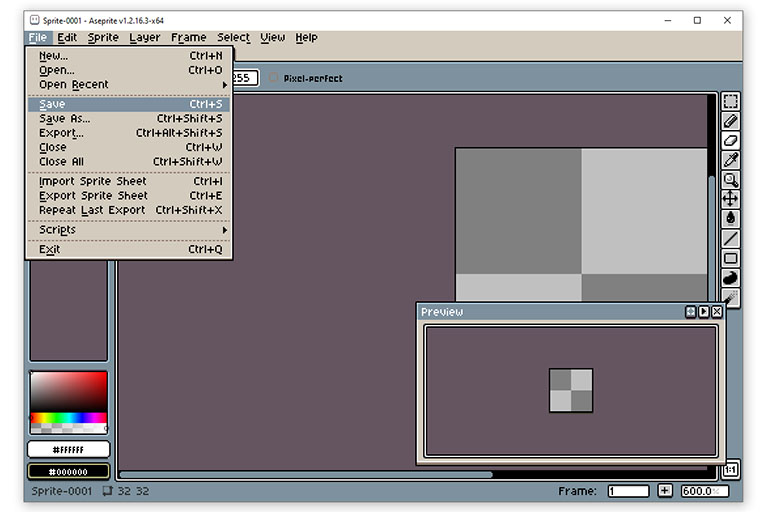
Menu items can be opened by holding down the Alt key and pressing the corresponding letter of the menu item.
- Main menu item option keyboard shortcuts will be indicated on the right of each option. By pressing these keyboard shortcut keys, the corresponding option can be selected without having to go into the menu item first. For example, the keyboard shortcut for Save is Ctrl + S.
- The third way to get the shortcut keys is by hovering the mouse over its area. This is mainly the case with, for example, the tools.
- All the shortcut keys can also be viewed by using Aseprite’s Keyboard Shortcuts section (see below).
Common shortcut keys for Aseprite
Colours
Select secondary (background) colour: RMB
Tools
Pen Tool: B
Eraser Tool: E
Inkdropper Tool / Colour Select Tool: I or Alt while another tool is selected
Rectangular Marquee Tool: M
Line Tool: L
Selections
Deselect (All): Ctrl + D
Move selected: LMB + drag selection
Copy and Move selected: Ctrl + LMB + drag selection
Create Brush from selected: Ctrl + B
Menus
Layer Menu: Alt + L
Frame Menu: Alt + F
Commands
Paste copied selection: Ctrl + V
Grid
Toggle pixel grid: Ctrl + Shift + '
Layers
Frame
Viewing & mapping keyboard shortcuts in Aseprite
Artists using more than one software package, e.g. Adobe Photoshop, can become heavily dependent on each software package’s shortcut keys. It can be quite frustrating to have to use different shortcut keys to do similar tasks in another package.
With Aseprite, custom keyboard shortcuts can be viewed and/or altered using the Keyboard Shortcuts section. This section is situated under the Edit menu under Keyboard shortcuts… It can also be accessed by pressing the Crtl + Alt + Shift + K keys on the keyboard.
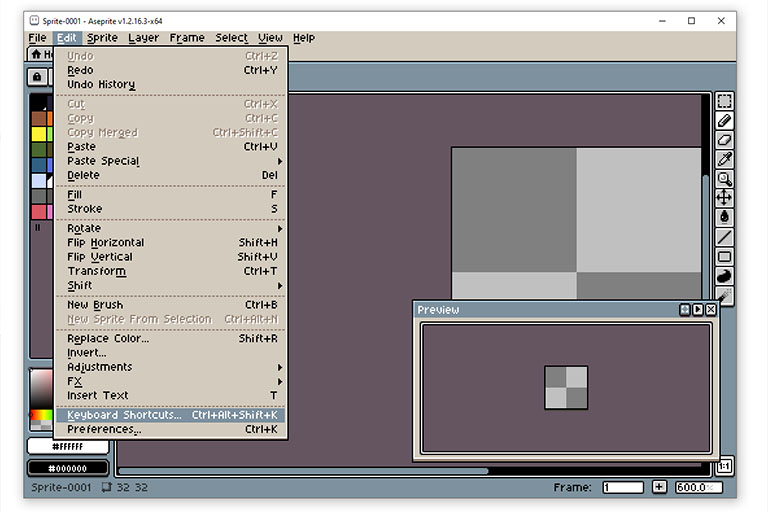
Aseprite’s Keyboard Shortcuts… menu item is situated under the Edit Menu.
The Keyboard Shortcuts section shows the keyboard shortcuts (Key) that are assigned to their corresponding Action. The keyboard shortcuts are grouped by Menus, Commands, Tools, Action Modifiers and Mouse Wheel. The keyboard shortcut for a specific function can also be obtained by using the search bar on top of the Keyboard Shortcuts section.
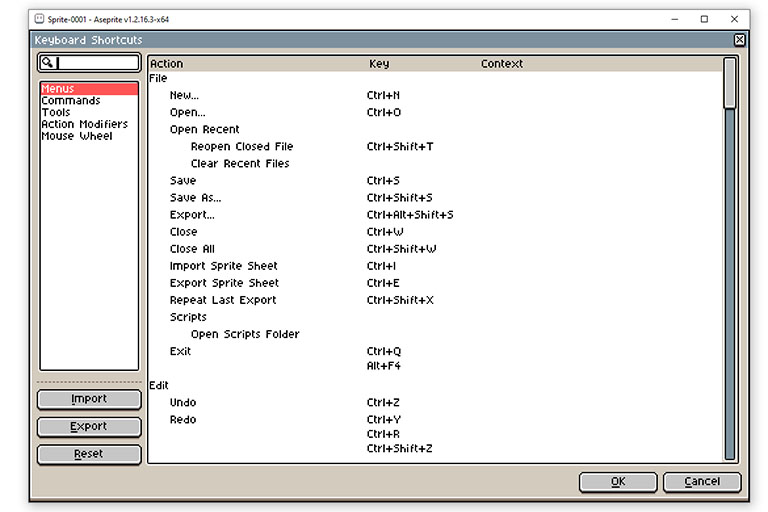
Aseprite’s Keyboard Shortcuts editor screen.
Here, new or additional shortcuts can be created or can be changed. By simply hovering over the Action or Key with the mouse pointer, options will appear.
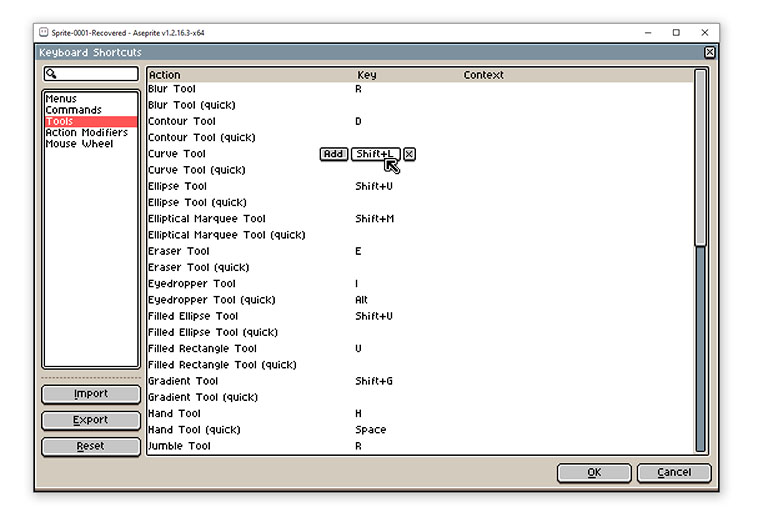
Choosing a keyboard shortcut to change in Aseprite.
By choosing Add, a new shortcut can be assigned to the Action and by choosing X the shortcut will be removed. Similarly to Add, by choosing the assigned key, the shortcut key(s) can be altered.
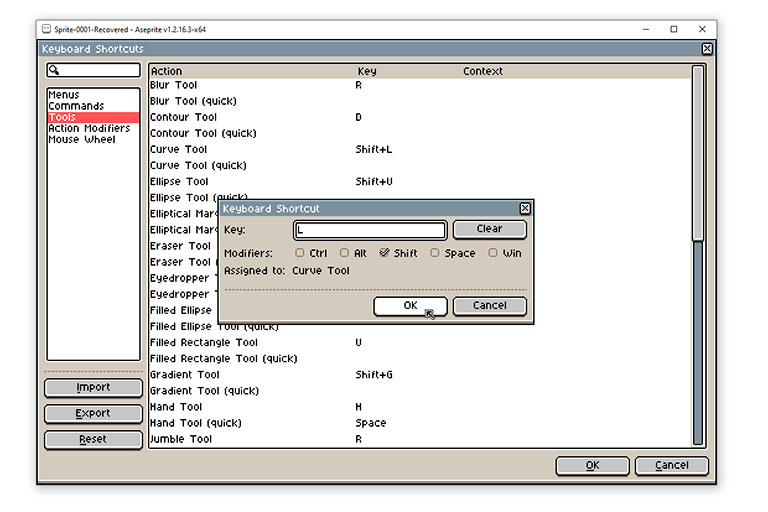
Changing a selected keyboard shortcut key in Aseprite.
The modifier is the key that needs to be pressed in combination with the key. Aseprite will also show to which key the current shortcut is assigned to (in case there is a conflict).
Importing and exporting keyboard shortcuts
Aseprite keyboard shortcuts can also be exported, imported or be reset to the defaults. In the case where changes were made to the default Aseprite keyboard shortcuts, it can either be reverted back to the default by using the Reset button, or Exported to an “aseprite-keys” file where it can be shared or stored. Aseprite-key files can also be Imported.
Conclusion
As with other GUI software programs, Aseprite can also be used with shortcut keys. Either the default shortcut keys, imported shortcut keys or newly assigned shortcut keys can be used. This post also lists the commonly used shortcut keys for Aseprite.