Blender animation rendering can take a lot of time. This post shows how to use per-frame rendering to be able to pause and resume animation rendering.
Table of contents
Introduction
Rendering animation can take a lot of time. Unfortunately, Blender (at least up to version2.79b (Mar 2018)) does not offer a pause/resume function while rendering, but this post will introduce settings and a workaround to this potential problem.
Animation in Blender can be rendered as individual image files or as one movie file. The first thing newcomers tend to do when rendering animation in Blender is to set the output to a movie file. This will mean that if the render was interrupted (for whatever reason), the movie file will break — and all the selected frames will have to be re-rendered.
The ultimate goal of this post is to introduce a way to be able to secure animation renders to reduce the incidences of having to re-render entire scenes. Two of the biggest problems I encounter while rendering animation are that I use my PC for other tasks too and that we have an irregular electricity supply. Having an interruption traditionally means that the entire scene has to be re-rendered. By using the setup below the animation render can be ‘paused’ or stopped at any time, and ‘resuming’ can take place irrespective of the reason the render has been stopped.
This method will work with any renderer (Blender Render and Cycles Render) and can be used in combination with planning frames and sharing resources.
- Get the LG 22MK430H-B 21.5″ Full HD Monitor from Amazon.com
- Get the MSI GeForce GTX 1060 6GB GPU from Amazon.com
- Get the Corsair K95 RGB Platinum XT Mechanical Gaming Keyboard from Amazon.com
The Blender rendering process
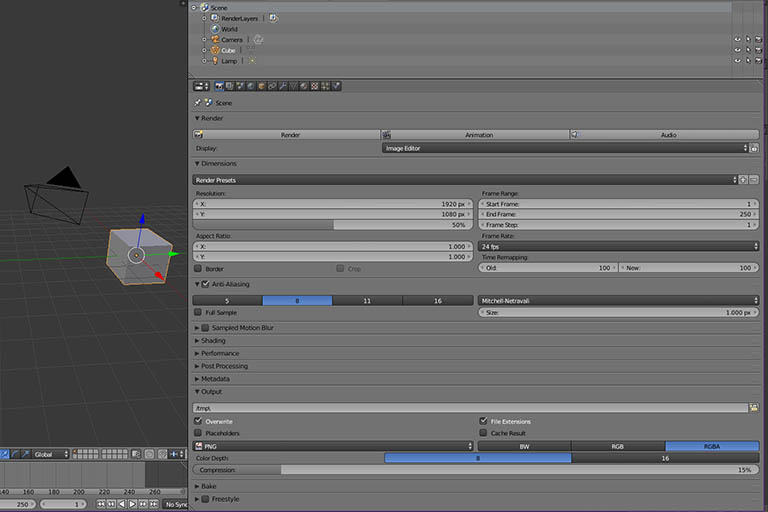
Blenders’ render settings are situated in the Render tab under the Properties panel. For the purpose of this post, the important settings in the Render tab include the frames that need to be rendered, the output directory, the render dimensions and the file format. By default, Blender will render PNG files and save them in the /tmp/ directory in the root directory of your PC.

The important settings in the Render tab include the frame or frames that need to be rendered, the output directory, the render dimensions, and the file format.
‘Pausing’ and ‘resuming’ animation rendering in Blender
In principle, the idea is to render animation as individual images and, then afterwards, adding them together to create a movie file. By rendering as images instead of one movie file, the last frame (where the render was ‘paused’ or interrupted) can be inspected and can be used to set the first frame to start off with.
Rendering individual files

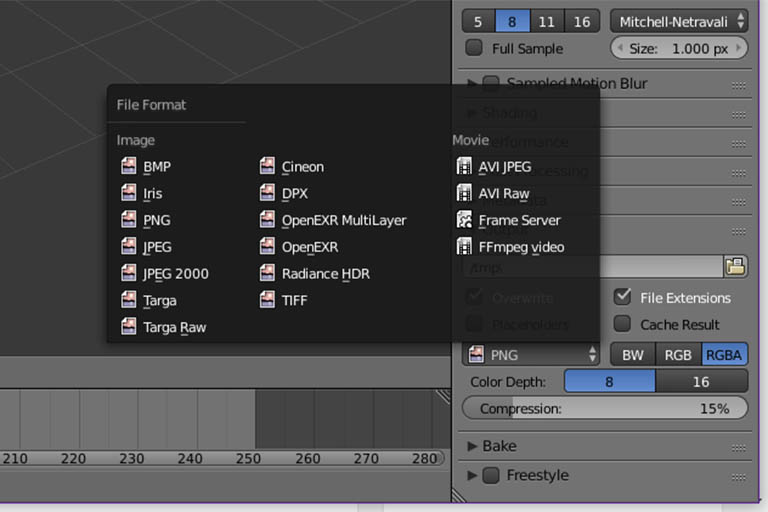
Multiple file formats are available under the Output section of the Render panel. The default file output is PNG.
Instead of choosing a movie file format, rather set this to an image file format. The default is PNG, which will be perfect in most cases. After the file format has been chosen, one might also want to choose a more appropriate directory where the files will be saved. Overwrite is selected by default, which is also what you might want in this case.

It might be a good idea to set the output directory to a more specific one when rendering multiple files.
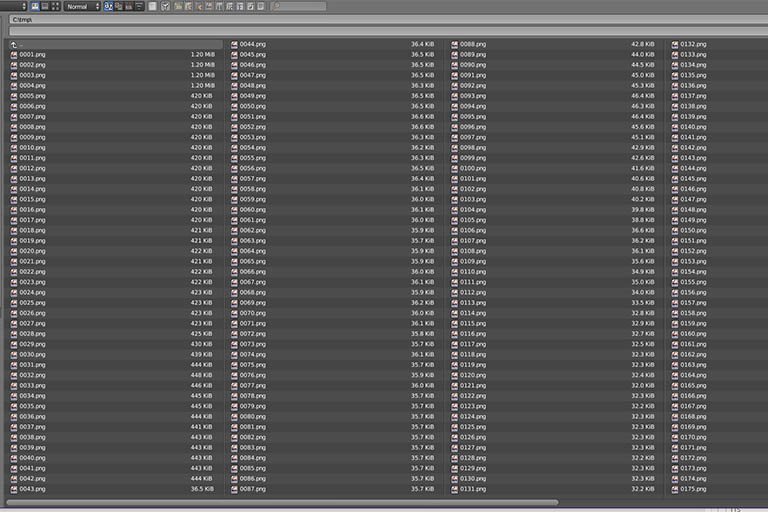
The rendering process can now continue as usual, but after each frame has been completed, it will be saved as a single file in the chosen directory. Each file will be saved with the frame number as a name. By selecting Overwrite, sections of the scene can be set to be re-rendered if needed without adding additional files to the rendering directory.
Evaluating the rendered files and their file names
No matter the reason, whether the rendering process was stopped or interrupted by any other means, the chosen directory will contain all the files that have been successfully rendered.
By looking at the last rendered file and its file name, the first frame can be established to continue an interrupted render process. In other words, if a scene has 100 frames and the last frame after the interruption is frame 29, then Blender can be set to start rendering from frame 30 again. If the animation render process has been completed, the last frame can be noted down for rendering the frame files into a movie file.
Rendering frame files into a movie file
After all the required frames have been rendered, each into their own file (see earlier), the files can be combined to create a movie file. To do this, open a new instance of Blender and open the Video Editing layout from the screen layout section. Click on Add -> Images and select all the rendered frames/files in the above-chosen directory (press A) and press the Add Image Strip button.
The frames will now appear on the Video Sequence Editor’s timeline control similar to the Timeline and Playback controls in the Default layout. By going back to the Default layout in the screen layout section, the frames can be combined into a different file format, i.e. a movie file format, by using the Render tab and Animation button again.
Remember to set the output directory, match the End: frames, and to set the Resolution matches the resolution the frame files were rendered at.
Conclusion
Having an interruption in the Blender animation rendering process means that the entire scene has to be re-rendered. By using the setup discussed here, the animation render can be ‘paused’ or stopped at any time, and ‘resuming’ can take place irrespective of the reason the render has been stopped.


