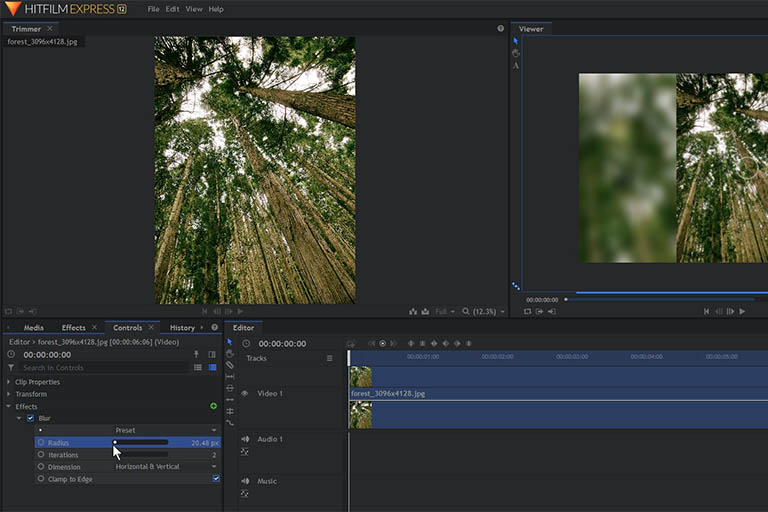
Vertical videos on a horizontal screen leave large spaces on the sides. This can be overcome by blurring the video and stretching it to fill the background.
Table of contents
Introduction to creating background effects for vertical images
Photos and videos taken with a cell phone camera are very often in a vertical position. When these images are imported into a horizontal video, there are nasty-looking sidebars. This can be overcome by blurring the image and stretching it over the background.
Blurring background effects are popularly used in home video productions where cellphone cameras are used. They are effectively used to turn vertical images into horizontal ones. This simple technique can make personal video projects look, and feel, a lot more professional. HitFilm Express 12 was used for this post.
For a quick reference, watch the Background effect for vertical images tips video on YouTube.
- Get the LG 22MK430H-B 21.5″ Full HD Monitor from Amazon.com
- Get the Sony MDR7506 Professional Large Diaphragm Headphone from Amazon.com
- Get the Corsair K95 RGB Platinum XT Mechanical Gaming Keyboard from Amazon.com
Step 1 – Add image/video to the Editor timeline
After the vertical image has been imported to HitFilm Express, simply drag it onto the Editor timeline. The first instance of the image (Video 1) will become the background. The image will automatically be scaled to fit the horizontal view area of the Viewer.
Now, drag a second instance of the image onto the layer above the first one. This will become the actual vertical image (Video 2).
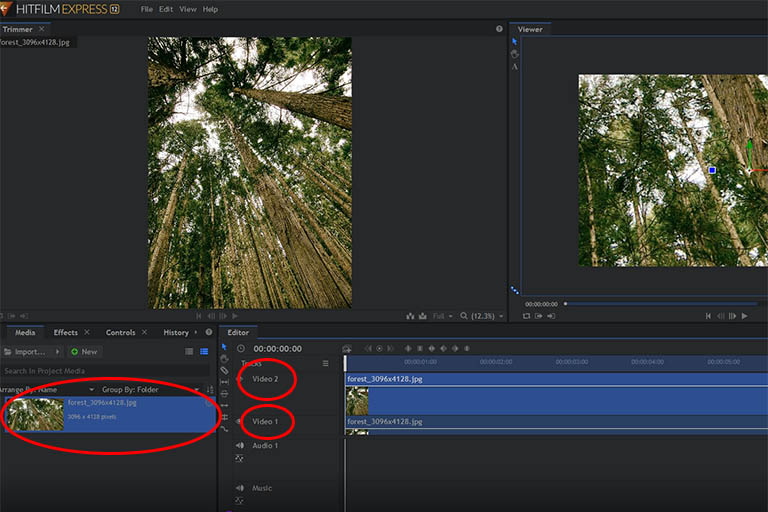
Both images are dragged from the Media Import tab to the timeline of the Editor. Video 1 will be the background video and Video 2 will become the actual video.
While the two instances of the image are lying on top of each other, the background image will be hidden.
Step 2 – Transform the image height
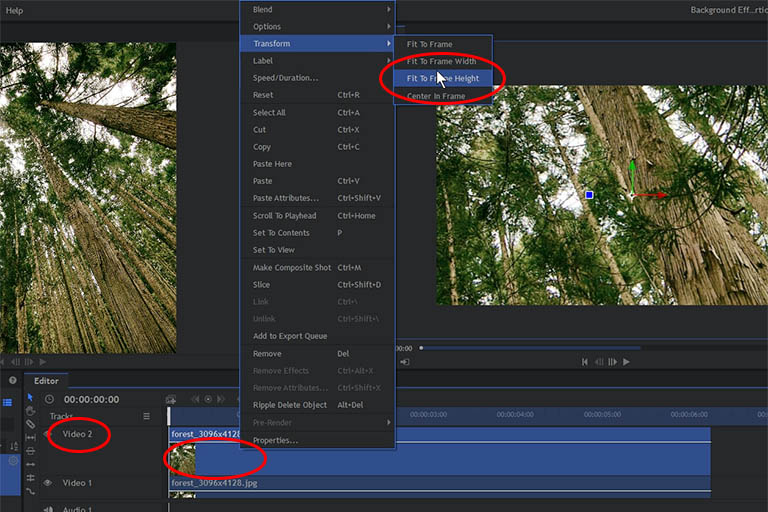
To change the vertical image to its original dimensions, right-click on its layer (Video 2) and go to Transform and choose Fit To Frame Height. Both layers will now be visible — one stretched, and one in its normal dimensions.
Step 3 – Apply a blur effect
To make the actual image (Video 2) stand out from the background image (Video 1), the background image can be blurred.
To apply a blur effect in HitFilm Express, go to the Effects tab and type ‘blur’ into the effects search bar. Drag the Blur effect onto the background image layer (Video 1).
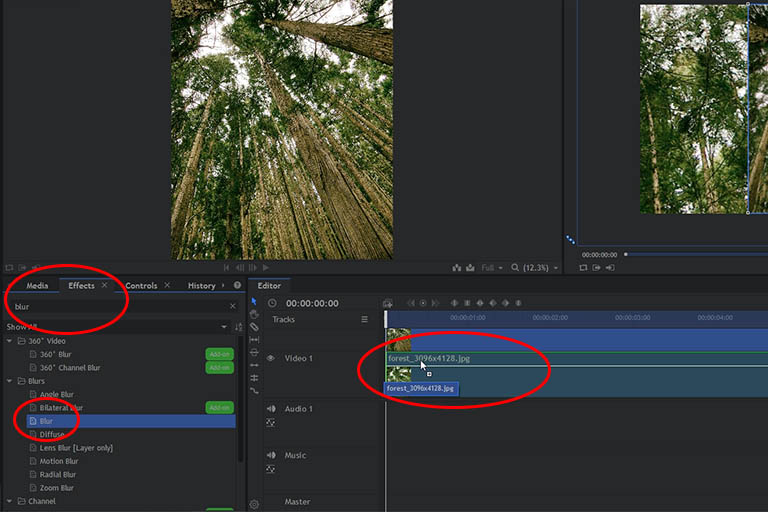
The blur effect is applied by selecting it from the Effects tab and dragging it onto the desired layer.
The blur effect can be adjusted by using the Blur Preset settings.
Effects other than blurring the background
Other effects can also be applied to the background. The background can be made lighter or darker, more transparent or have a hue (colour) shift. HitFilm Express offers various effects under the Effects tab.
Instead of creating a blurred image as the background, other photos and videos can also be used.
Conclusion
Vertically orientated photos and videos can be blurred and stretched as the background to remove the dead space. This post showed how to create a background effect for vertical images with HitFilm Express.

